Admin Console
Administer ScrambleID in the admin console: users, devices, federation, and organization settings.
Updated June 11, 2026


Admin Overview
The ScrambleID admin console provides a single online point of access for all types of admin users:
- Super Admin
- Security Admin
- Helpdesk Admin
- CallCenter Admin
A Super Admin has access to everything the other admin roles have, combined: branding, adding and deleting users, and login histories.
Admin Console Permissions by Role
| Permission | Super Admin | Security Admin | HelpDesk Admin | CallCenter Admin | User |
|---|---|---|---|---|---|
| Dashboard | Yes | Yes | Yes | Yes | Yes |
| Authenticate Callers | Yes | No | Yes | No | No |
| Org Settings | Yes | Yes | No | No | No |
| Setup Federation | Yes | Yes | No | No | No |
| Manage Users | Yes | No | Yes | Yes | No |
Dashboard
The ‘Dashboard’ lets a user view his/her ScrambleID Dashboard which displays login history & registered devices. The dashboard also has options to add a new device for ScrambleID login and manage existing devices.
Authenticate callers
The ‘Authenticate Caller’ permission is generally used by the relevant admins to provide a code to an end user who is trying to authenticate over phone. This is generally used by Helpdesk admins. Super Admins can also access this as they have access to all permissions.
Org Settings
‘Org Settings’ permission lets the admin configure organization level settings like OIDC config for enterprise login, custom branding of the portal and toggle different types of login options at organization.
Setup Federation
‘Setup Federation’ permission is generally used by the relevant admins to manage OIDC and SAML applications and toggle different types of login options at application level.
Manage Users
‘Manage Users’ permission lets an administrator invite users,
search and find users and generate action activation codes for
the user. This permission also enables viewing the login history
of the user and managing the user’s devices.
Getting started
Start by logging in to the admin console and exploring the user interface.
Login
Open the ScrambleID admin console in your web browser and log in with your credentials or your ScrambleID-enabled device.
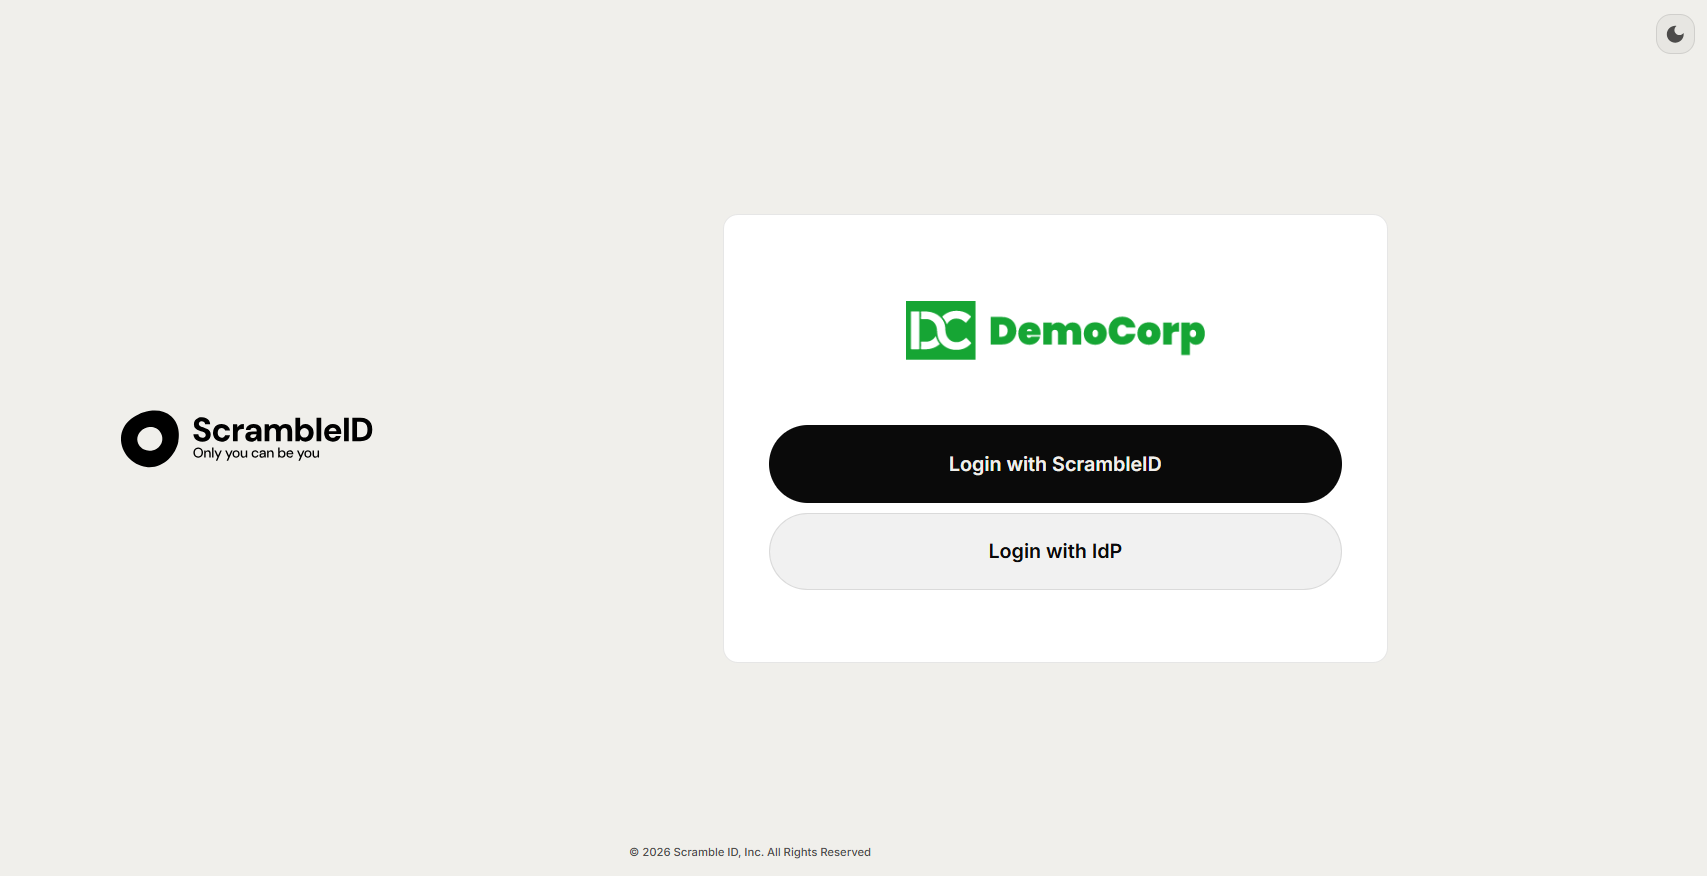
Click Login with ScrambleID
The Dashboard page opens, with a navigation panel on the left side.
Navigation
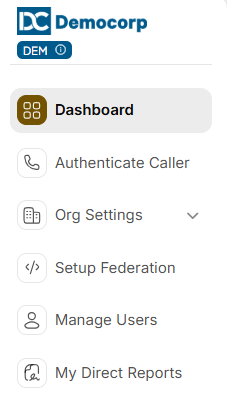
On the left-side menu, you can access every page and feature in the admin console.
Note: When a user is assigned as a Manager, an additional menu option, “My Direct
Reports,” is available on the dashboard.The Manager view is to manage direct report profiles and generate activation codes for them
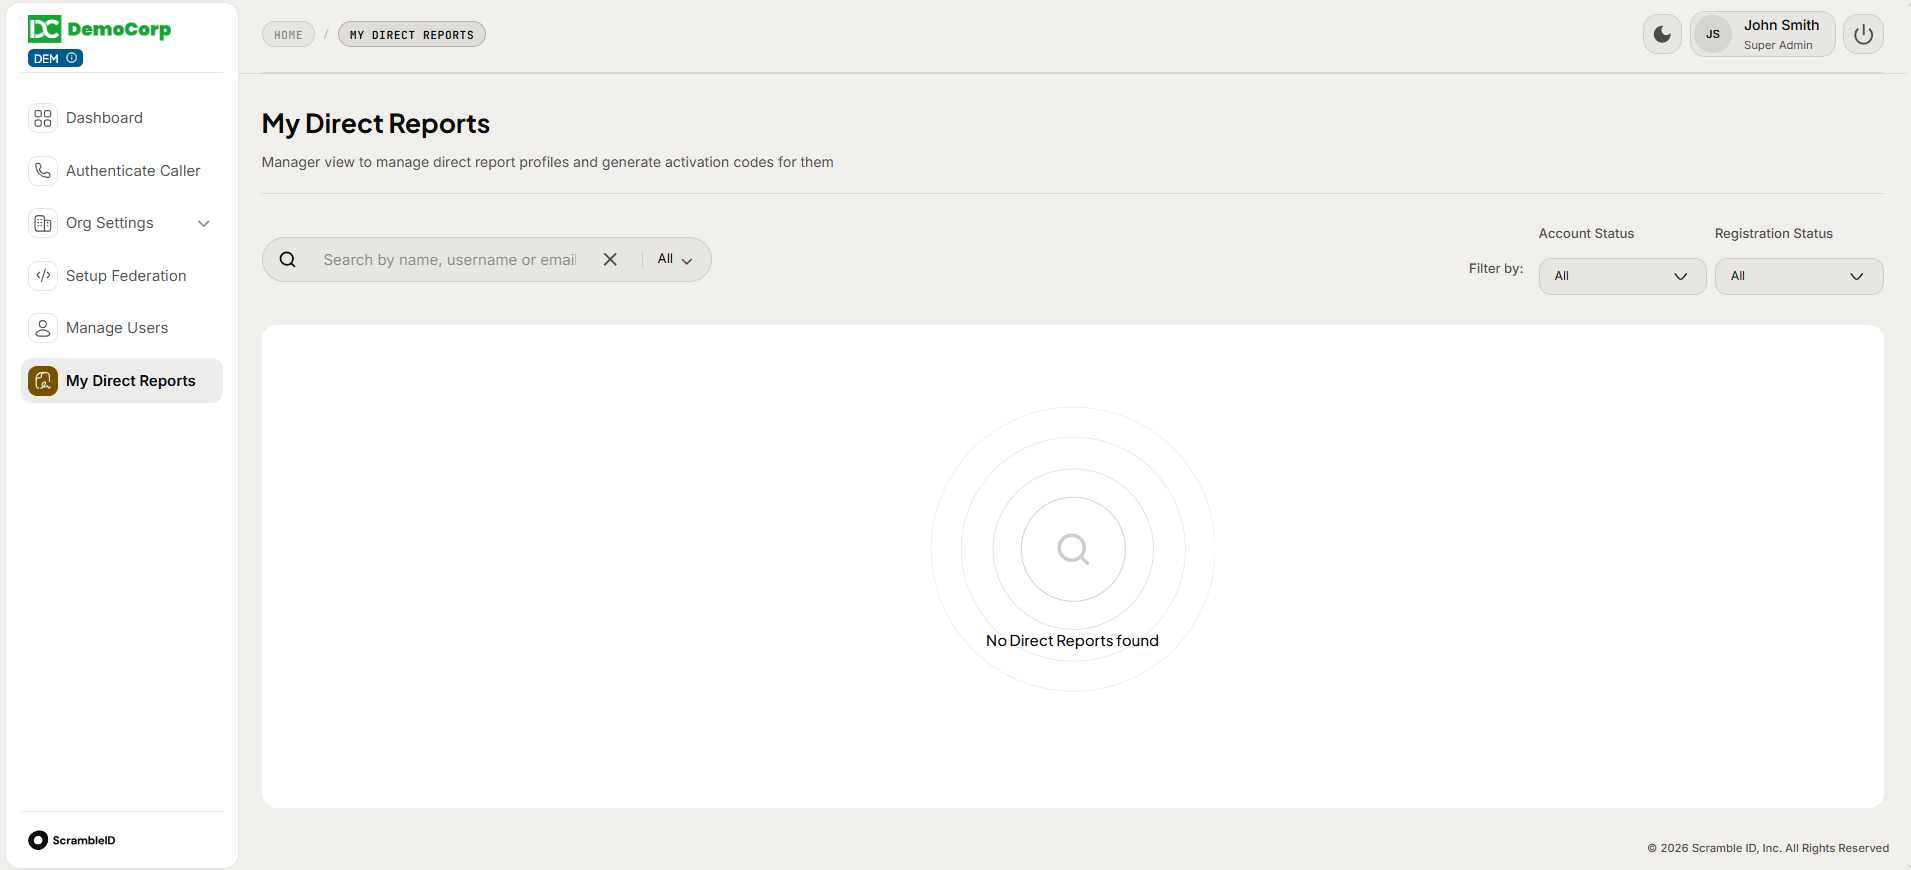
When a user is enabled with the Reporting Dashboard option, the menu should be available on the dashboard.
My Direct Reports allows you to search a user/bot by name, username or email. You can also filter by Account Status and Registration Status.
Logout
To log out of the application, click your user name on the top right, then click Logout.

Click Confirm to complete the logout process.
The confirmation dialog opens.
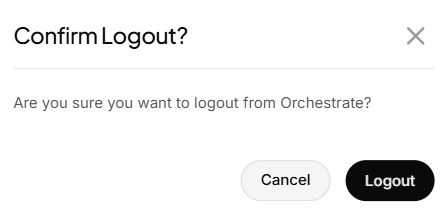
Click Cancel to return to the admin console.
Dashboard
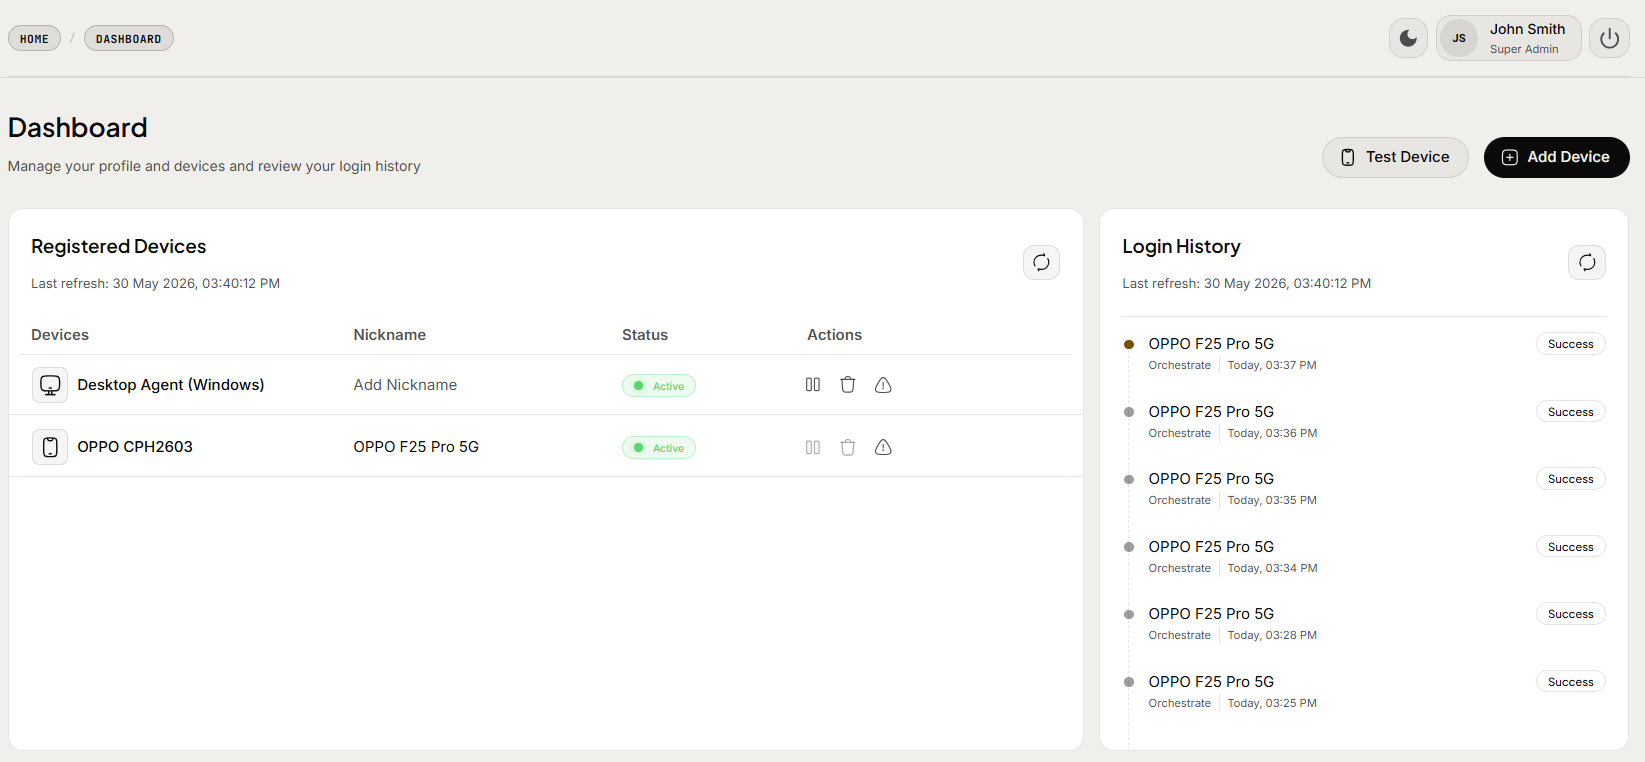
The Dashboard page lets you view and manage all the devices (example via Mobile, Desktop or Passkey) in your organization. You can also invite new users, and view device login history.
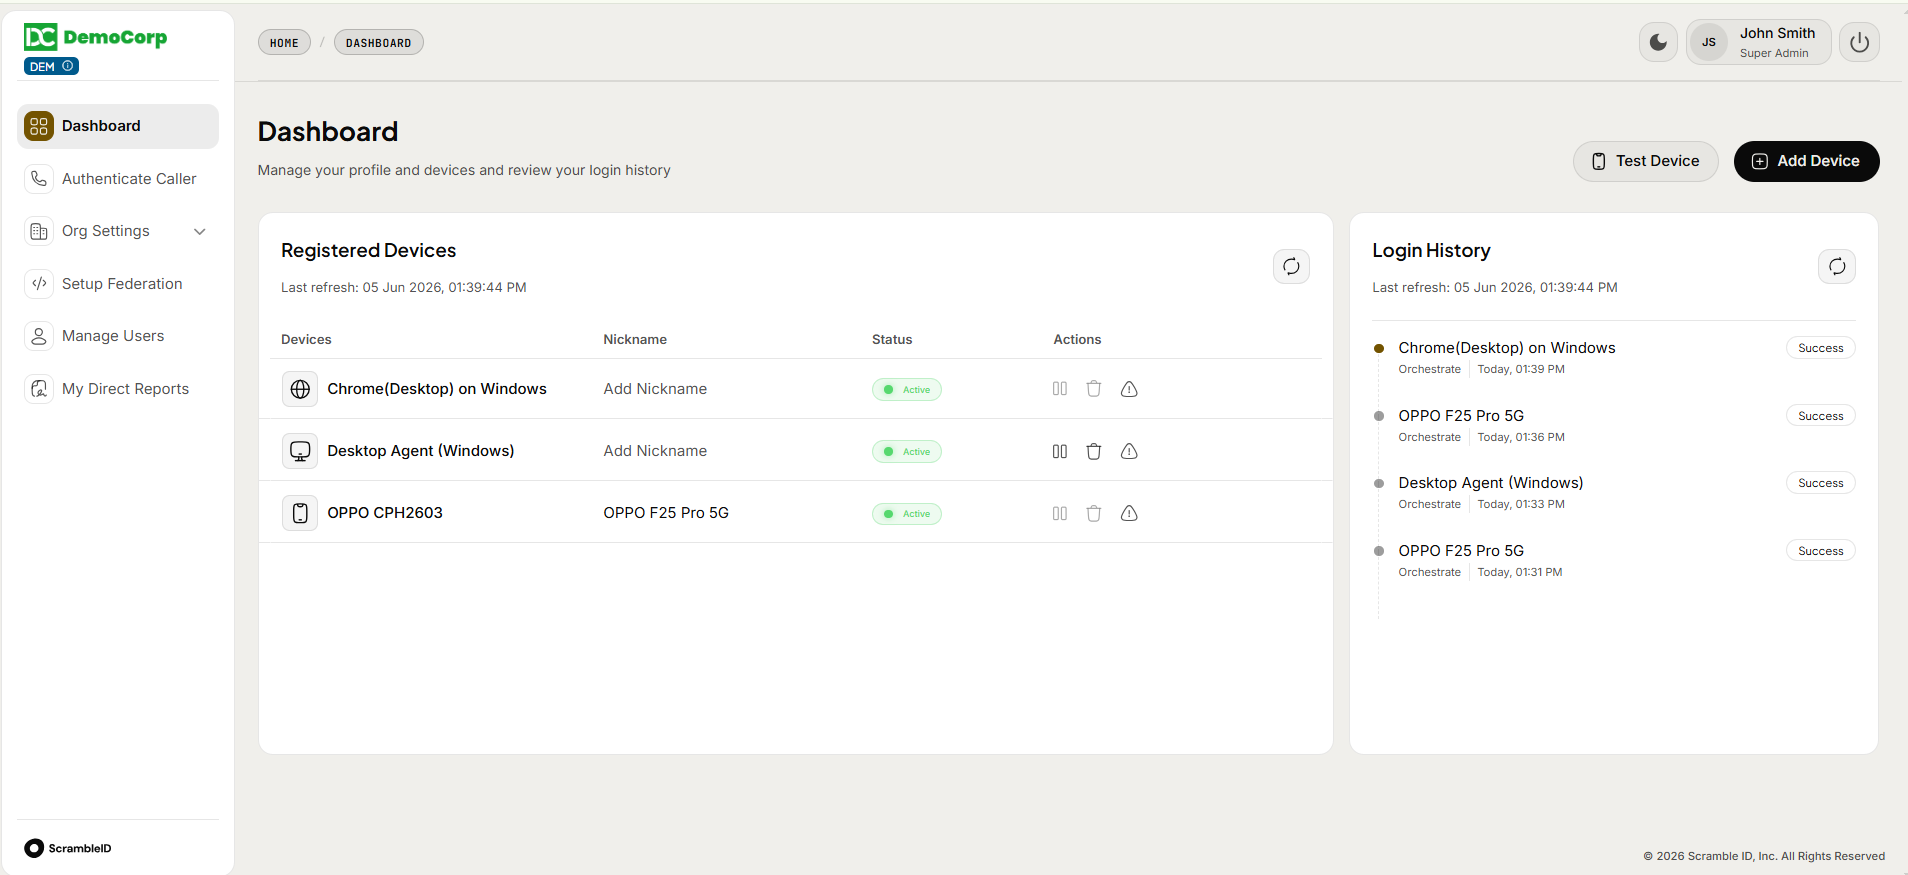
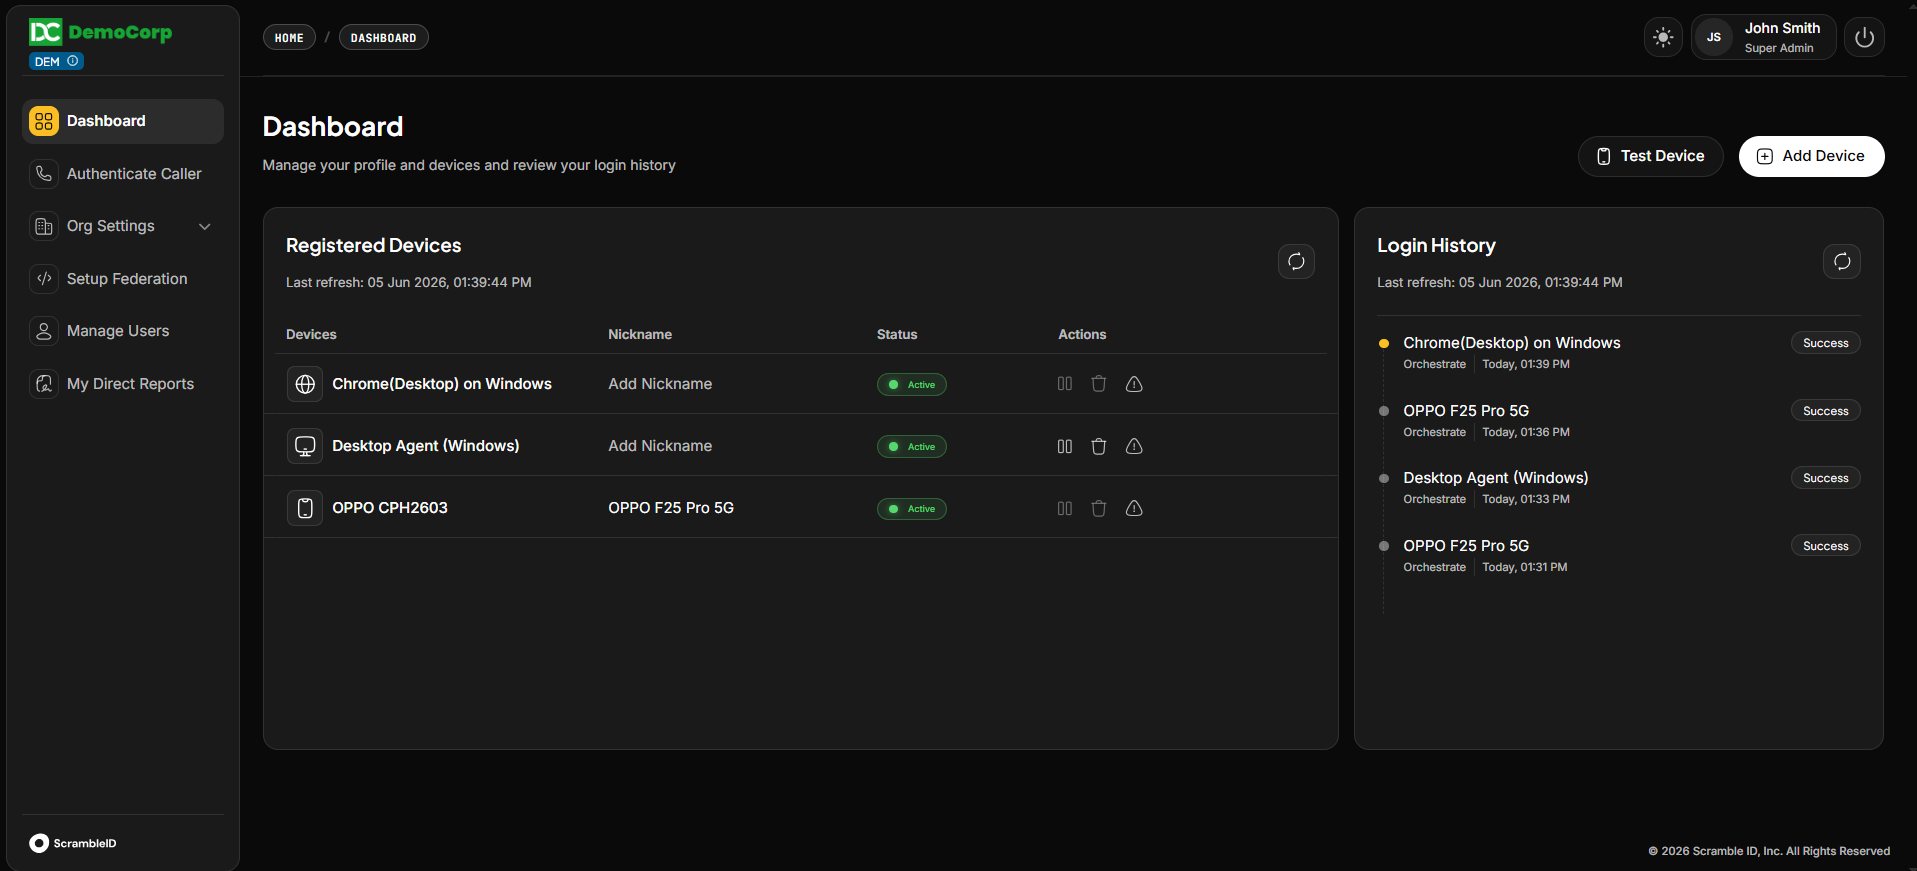
On the top right, you can switch to a dark theme by clicking on the icon.

Registered Devices
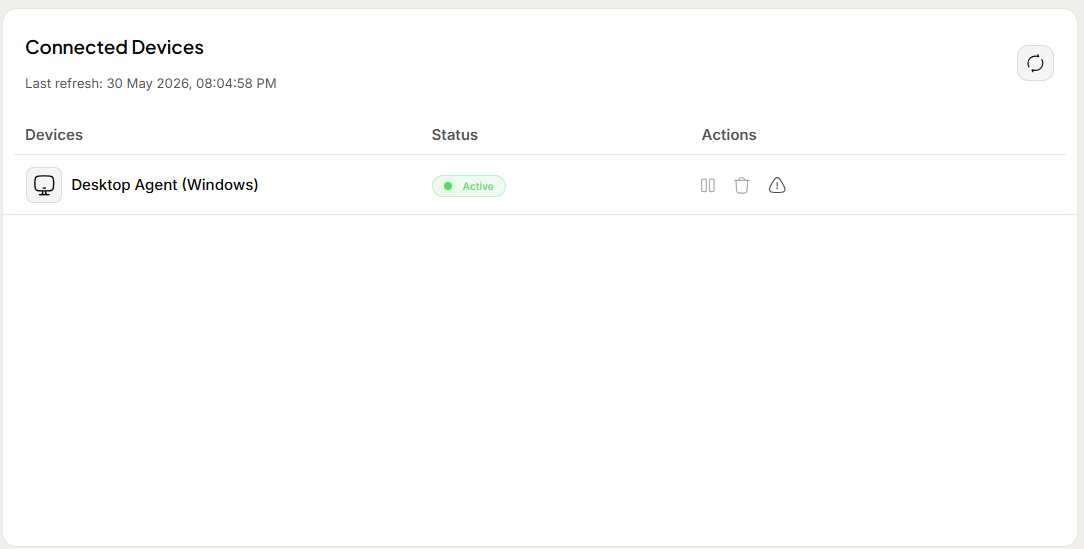
The registered devices section lets you view and manage devices that can be used to login using ScrambleID.
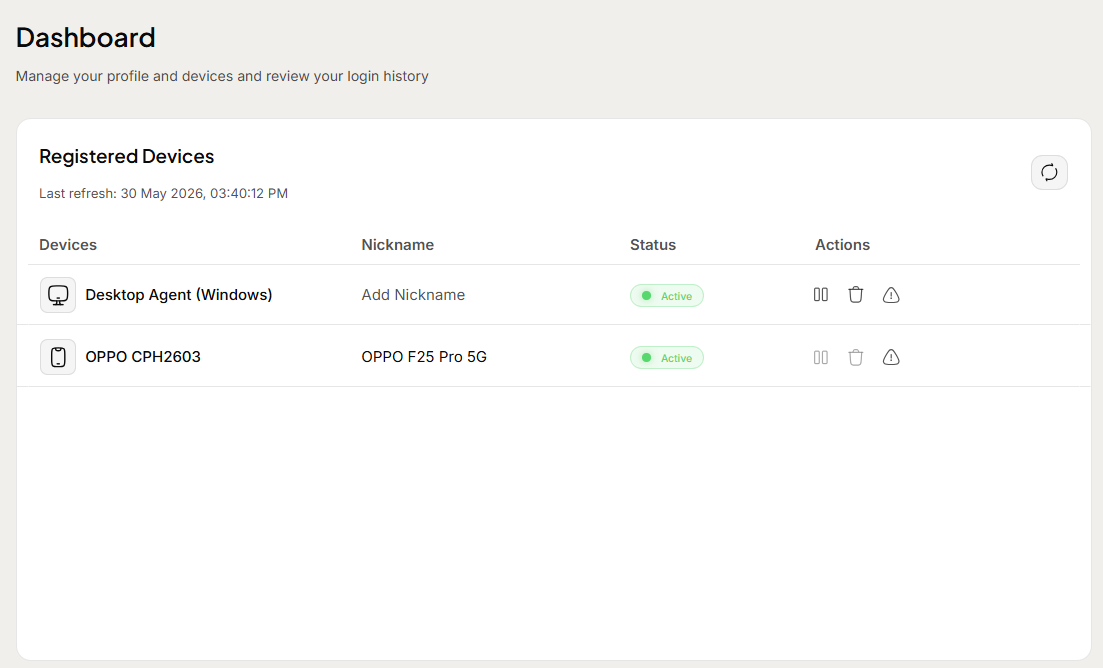
| Parameter | Description |
|---|---|
| Devices | Device make and identifier |
| Nickname | The Nickname option can be used to update the nickname of a device on sign-up. Admins/Users with access can edit the device nickname. |
| Status | Whether or not the device is ‘Active,’ meaning it is available for use with ScrambleID |
| Action | Description |
|---|---|

| Pause / Disable device can be used to disable login from that particular device | |

| Delete device removes this device from the list of devices allowed for the user to login | |

| Option to report a device as lost. In this case the device gets removed from the list of registered devices for the user. |
The

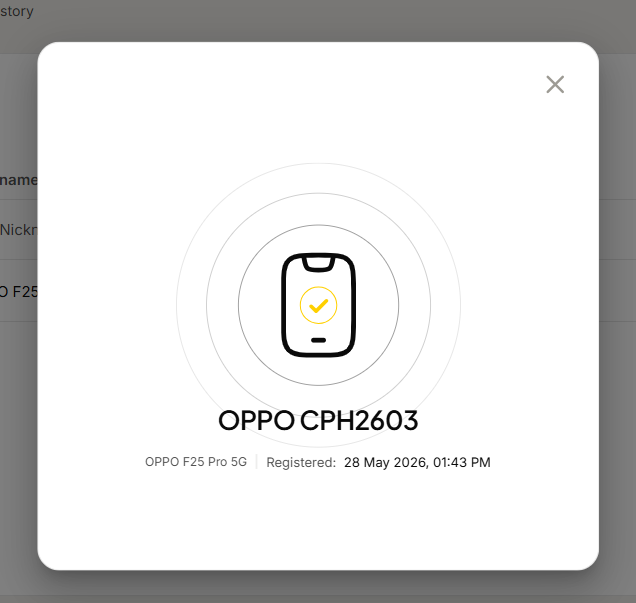
icon can be used to view the registered and last active date and time for that device.

Add New Device
To add a new device from the portal, on the top right, tap the “+ Add Device” button.
You can select Mobile or Desktop devices to add.
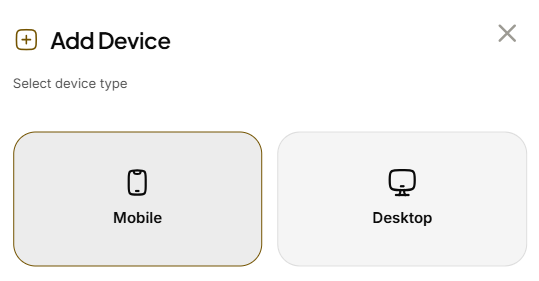
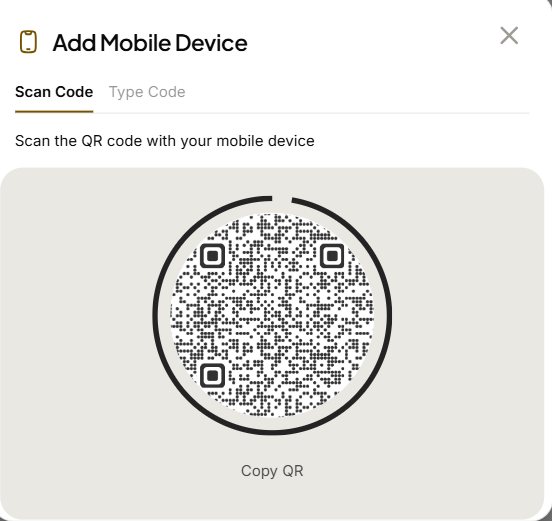
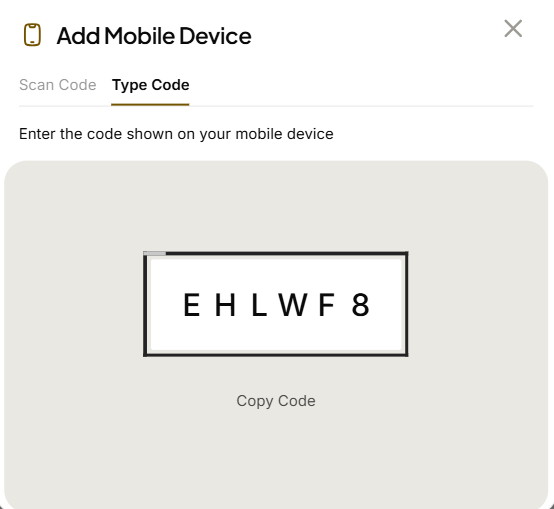
You can then use “Scan Code” or “Type Code” to add a new mobile device.
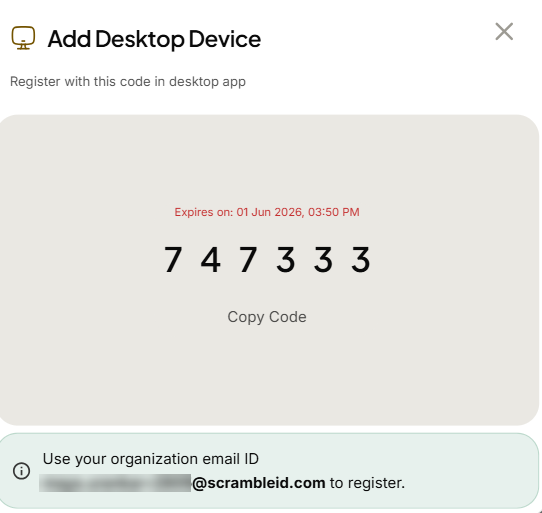
You can then use “Type Code” to add a new desktop device.
Test Device
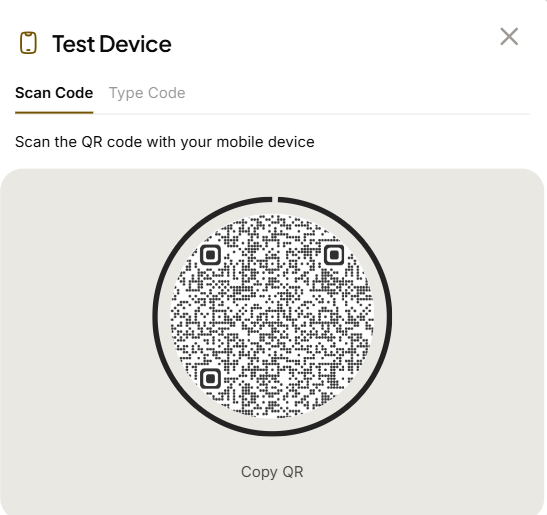
You can test a new device by tapping the “Test Device” button.
Use the Scan Code or Type Code option to test on any of your registered devices.
Login History
The login history section can be used to view the latest logins made by the user. It displays the device, source date and time of login.
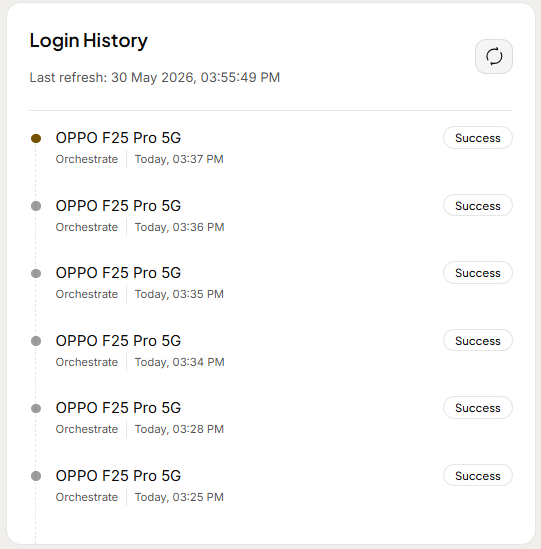
Various devices may be used to login like mobile devices, desktop applications and browser login using biometric, pin or passkey. Source of login may be 3rd party applications, the ScrambleID admin console or by calling Helpdesk over voice or IVR.
Authenticate Caller
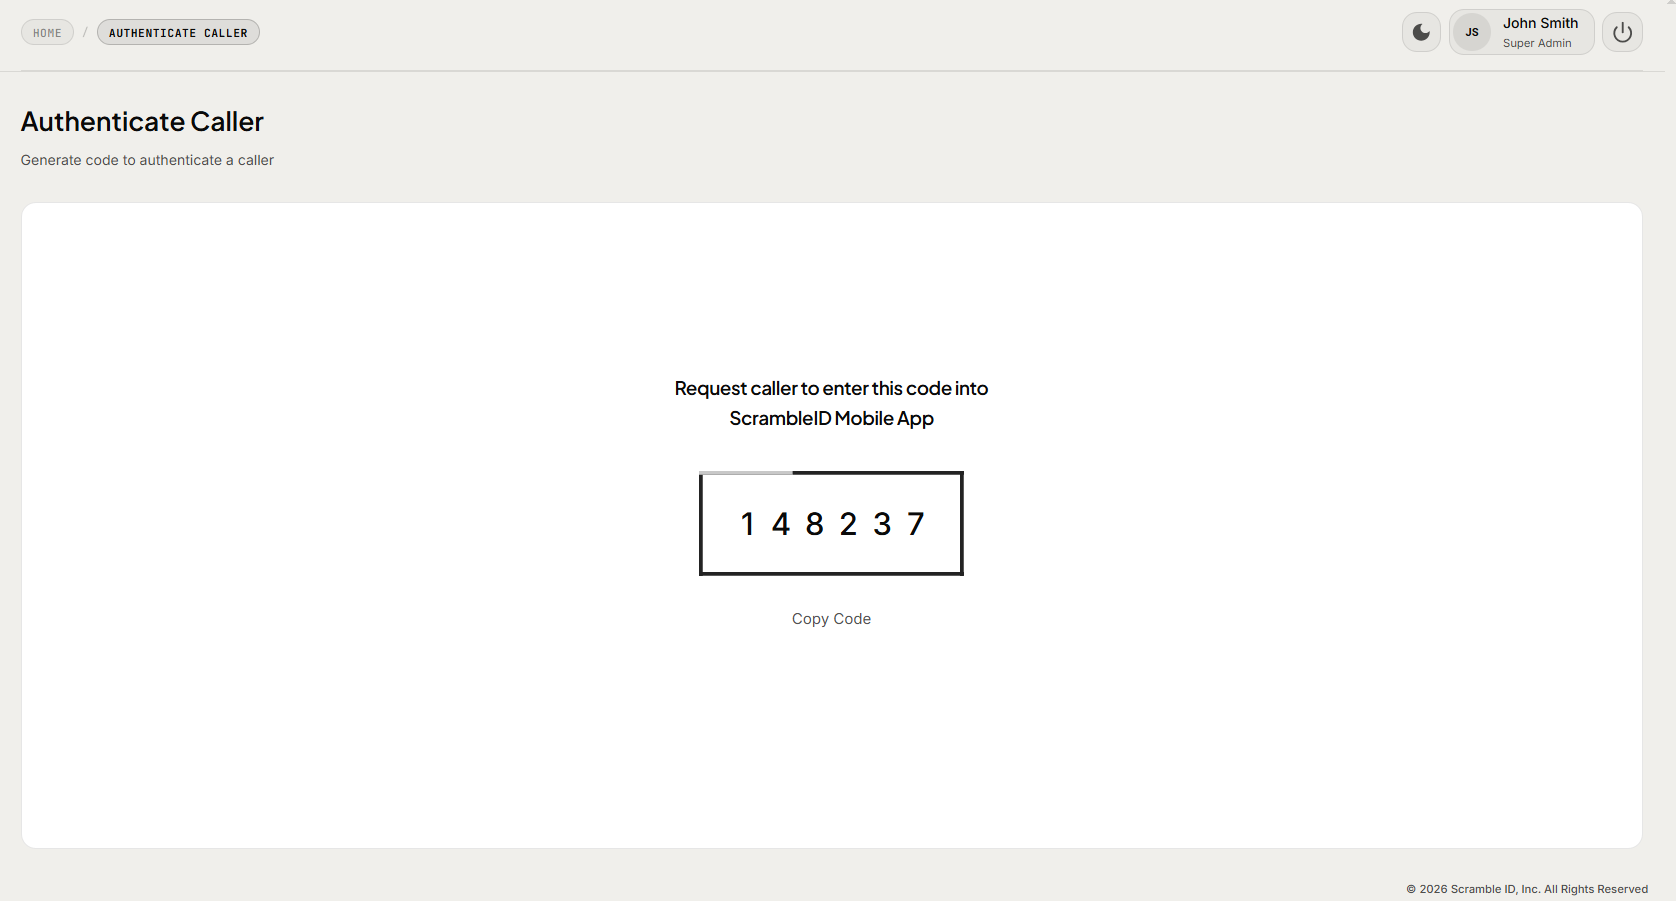
Help desk admins and Super admins have the ability to help callers authenticate by pulling up a six-digit auth code and talking the caller through the process of entering it into the app.
The code expires when the receding outline disappears.
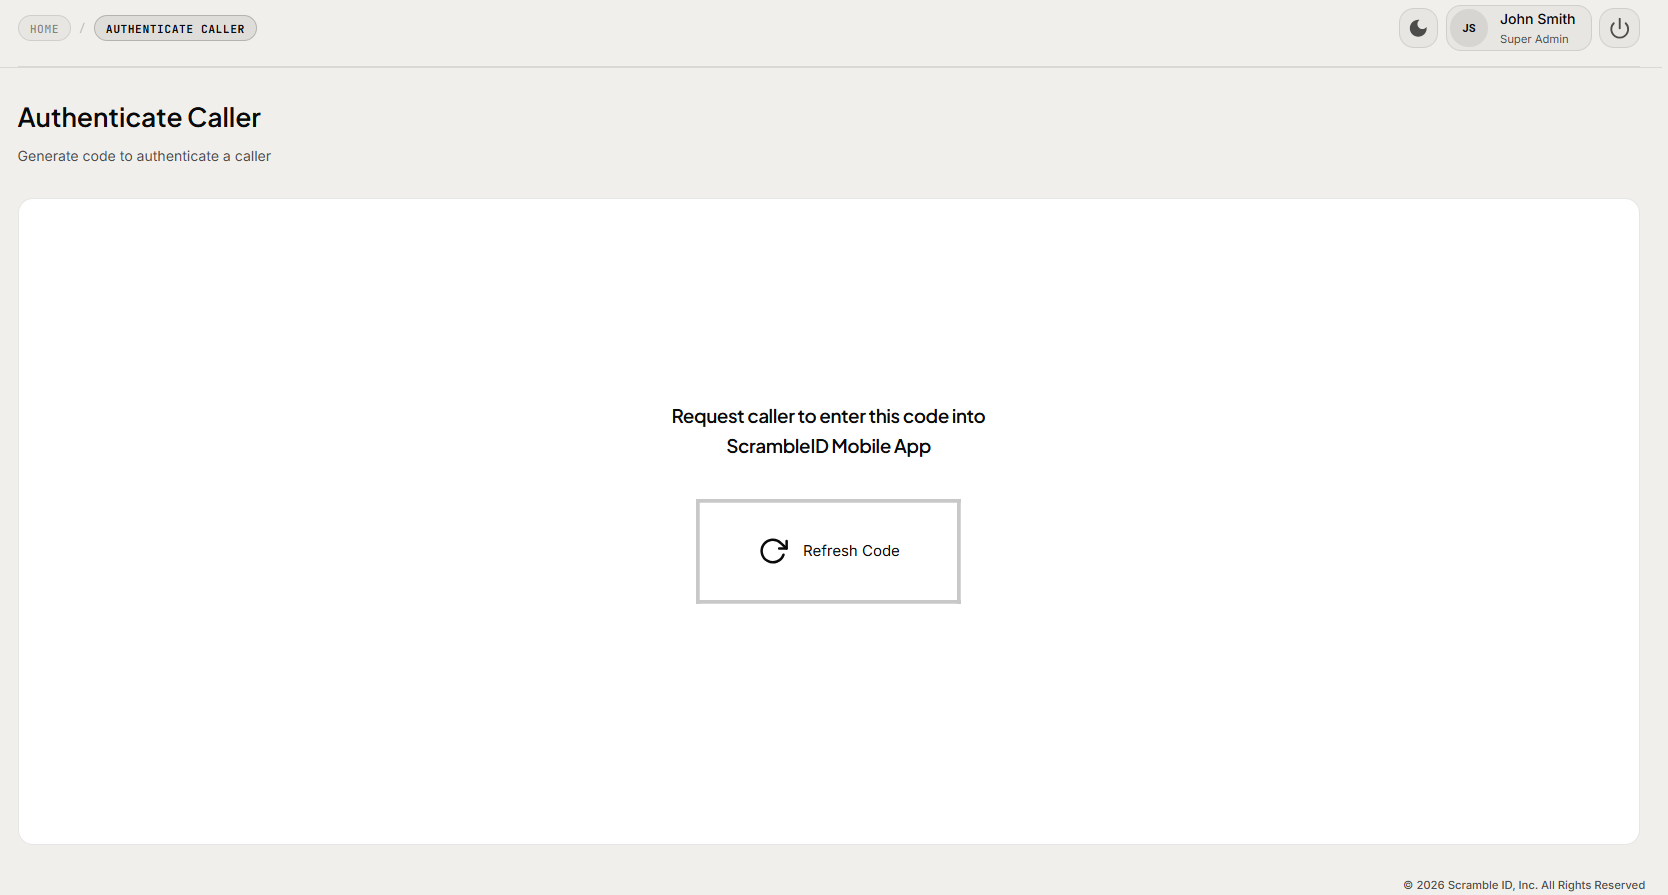
Click Refresh Code to generate a new one.
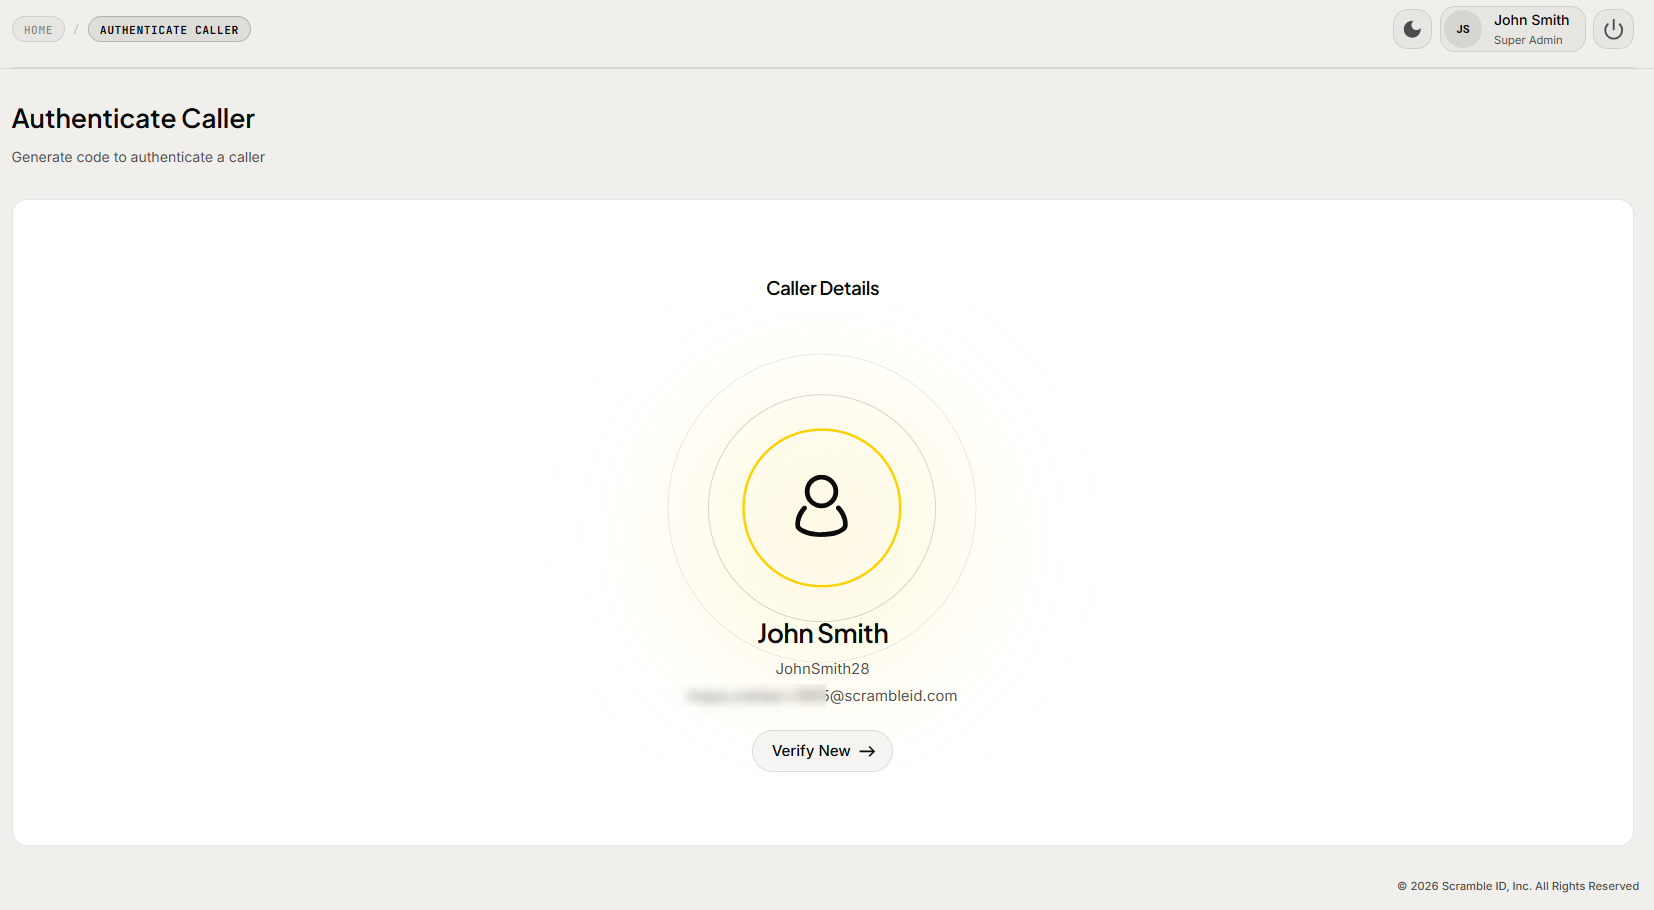
After the user on the call has successfully entered the code and logged in, a confirmation message with the caller details is displayed on the screen.
Org Settings
As a security admin or super admin, you can customize elements of your company branding on the login page.
Settings Overview
Organizational settings let you configure organization-wide preferences for your company. Settings include options unique to your user base, company branding, and login preferences.
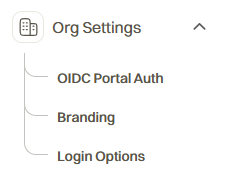


Org Settings options
| Options | Description | |
|---|---|---|
| 1 | OIDC Portal Auth | Set up OpenID Connect |
| 2 | Branding | Landing Page - Name, logo & Text |
| 3 | Login Options | Detailed Login configuration at Org, App & User level |
Org Settings > OIDC Portal Auth
Obtain your token, secret, and endpoint from your ScrambleID support channel. You may request new credentials at any time from ScrambleID support.
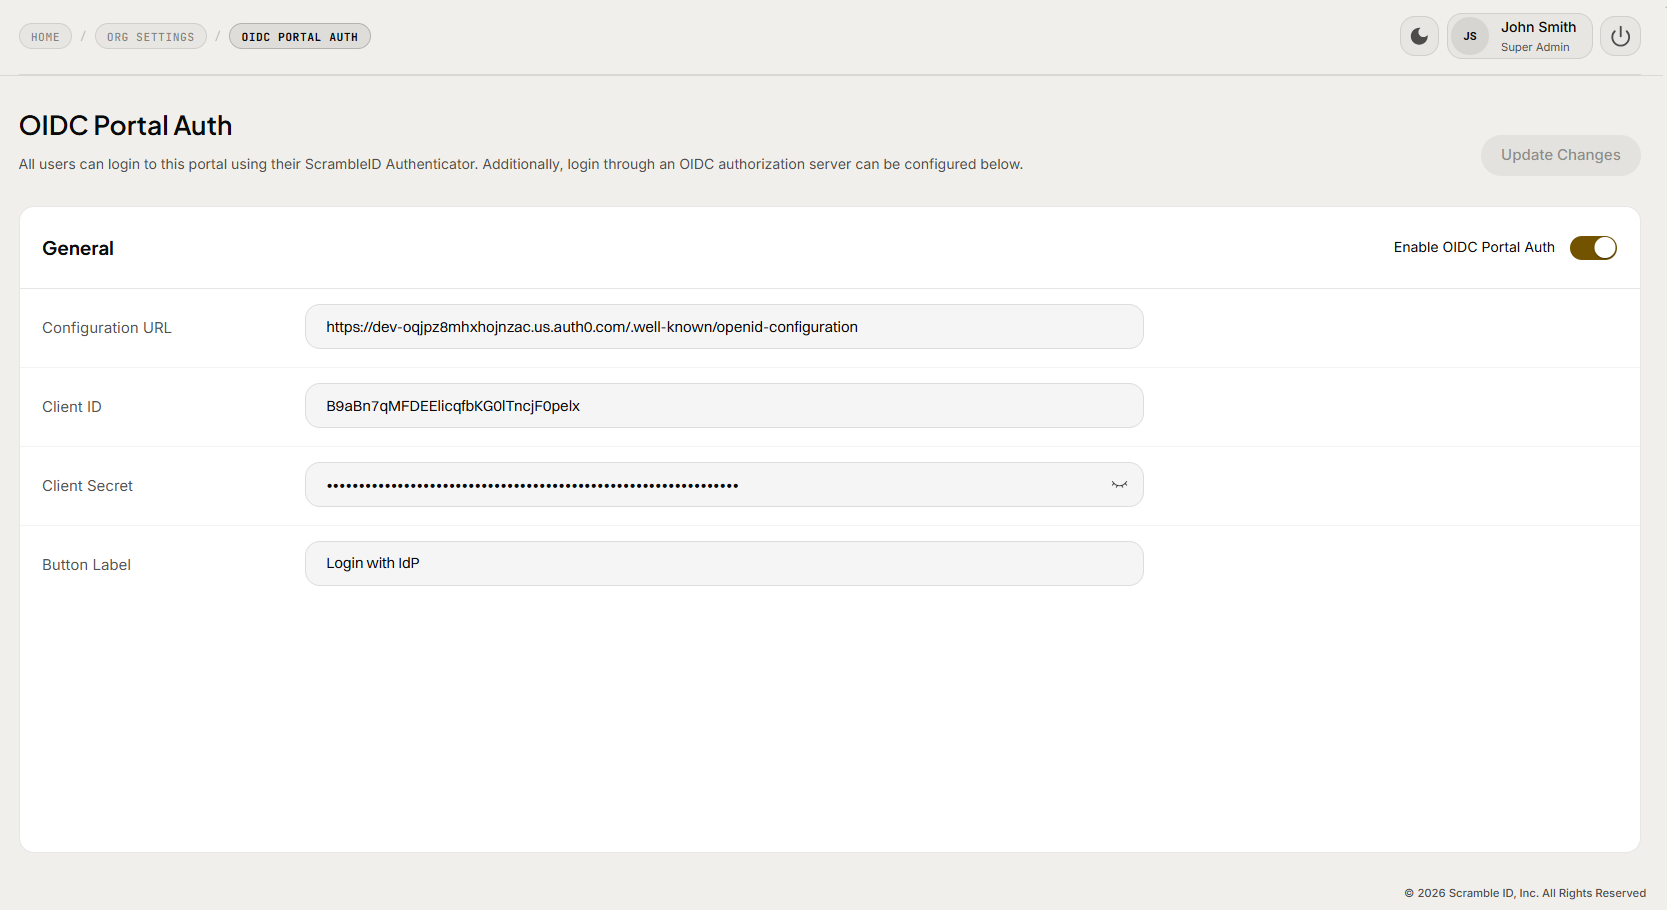
OIDC Configuration
| Options | Description |
|---|---|
| Configuration URL | URL for JWT authentication |
| Client ID | UUID for the client |
| Client Secret | Shared secret between OAuth and client-server |
| Button Label | Text to display on login |
| Enable OIDC portal Auth | Allow OAuth and client-server authorization |
Take care to keep these identifiers secure and always log out of the application when you leave your work area!
Org Settings > Branding
The branding setting lets an administrator customize the ScrambleID landing page including company name, logo, Org code, and display text.
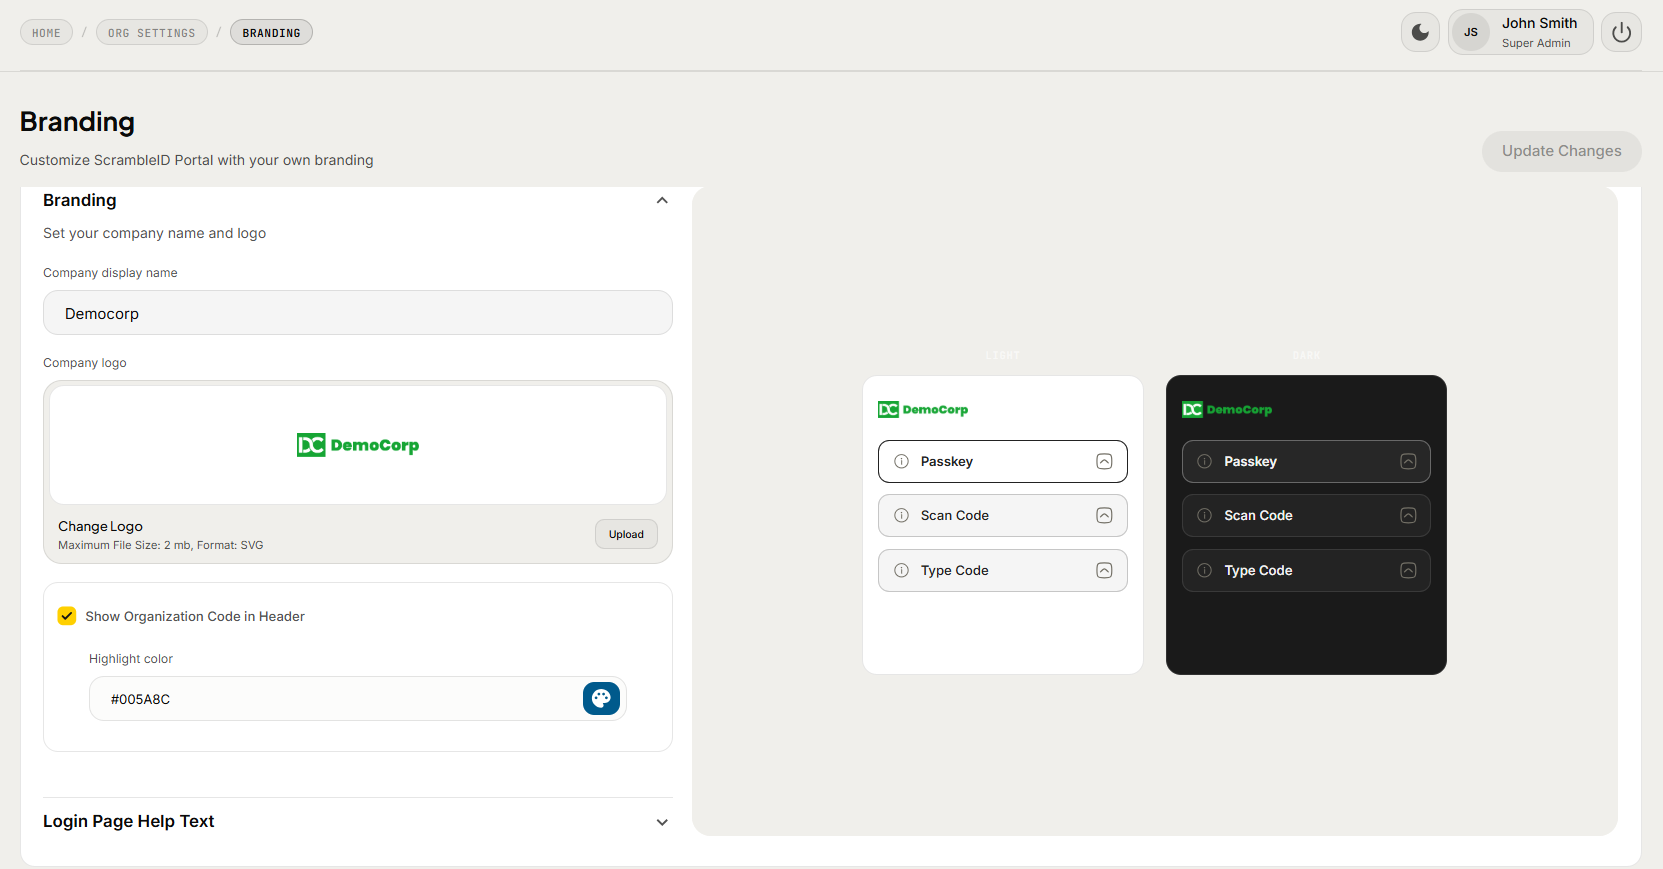
Branding Details
| Field | Description |
|---|---|
| Company Display Name | Your company name as you want it displayed on the ScrambleID login page. |
| Company Logo | Your company logo graphic. Maximum File Size: 2 mb, Format: SVG. |
| Show Org Code in Header | Org code that appears on top of the ScrambleID login page. The color palette***** allows you to change the highlight color. |
| Login Page Help Text | Update tooltip / help text on Login page. |
Make changes to the options above and to the top right, click the Update Changes button to save.
*****If your company has a branding or marketing guide with RGB hex codes, you can enter those directly for the primary color or select from the color picker.

Org Settings > Login Options
The Login Options page lets you configure the login experience and the login components available to end-users.
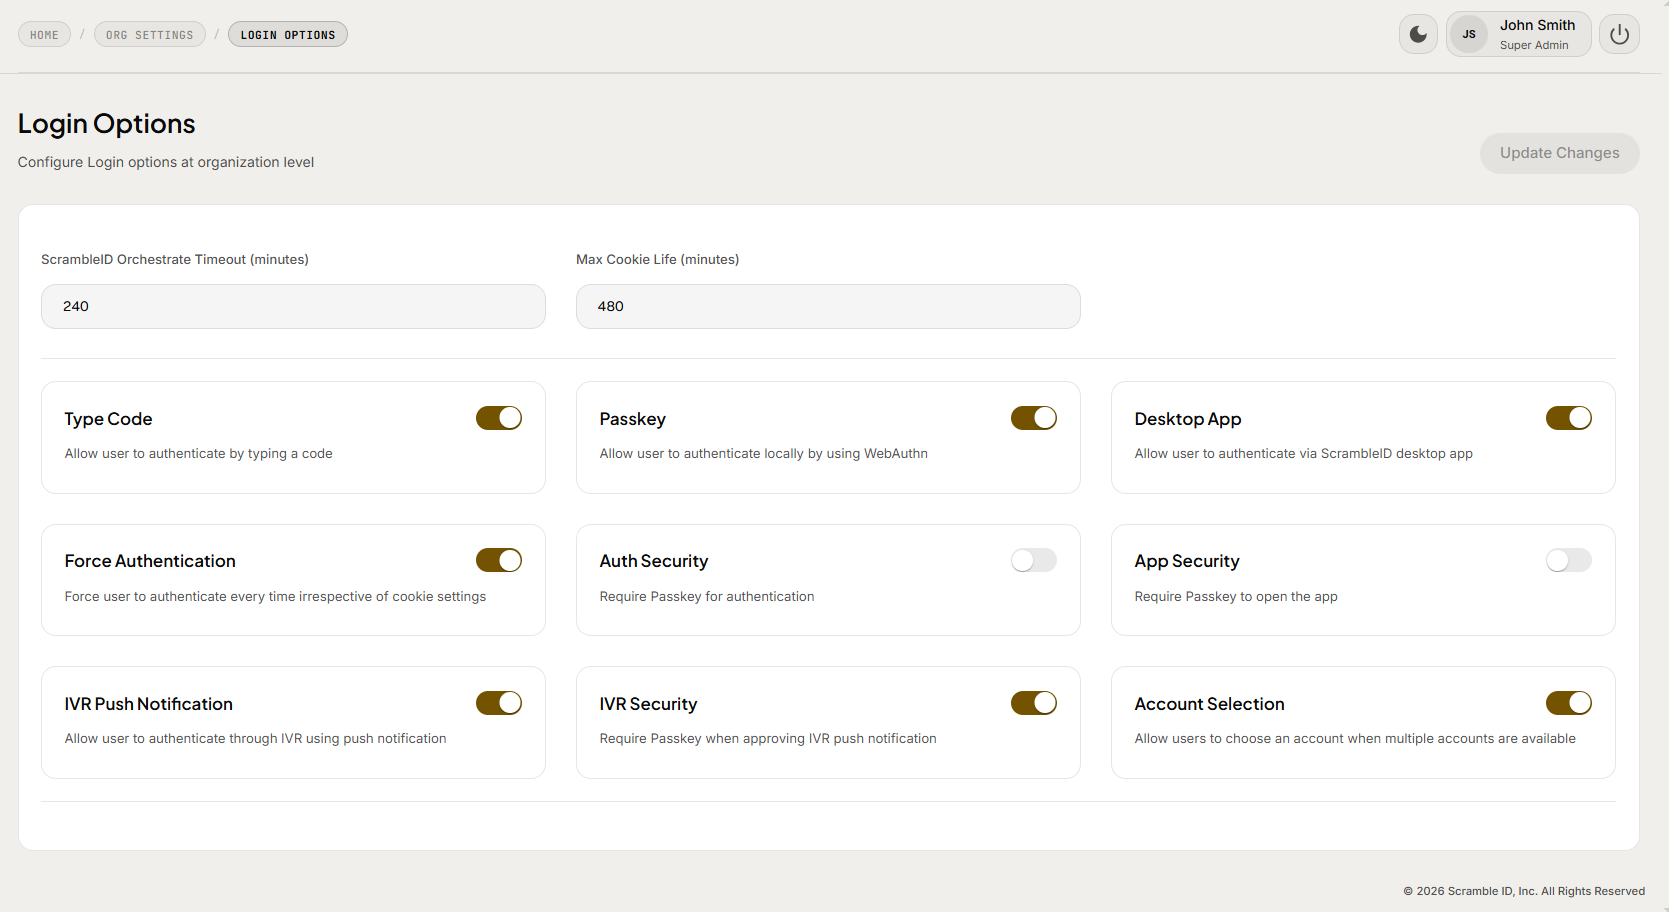
The organizational level sets the default for the login experience.
If there are different options for applications, they override the Organization's default.
Login Options
| Option | Description |
|---|---|
| Admin Console Timeout | The ScrambleID admin console automatically logs the user out after this number of seconds, e.g. 600 would log the user out after 10 minutes of inactivity |
| Max Cookie Life | Sets how long the session cookie lives before it's deleted and the user has to authenticate again. The session lifetime is policy-configurable by the admin |
| Type code | Allow six-digit code entry for access |
| Passkey | Allow user to authenticate locally by using WebAuthn |
| Desktop App | Users can authenticate through the desktop app |
| Force Authentication | Force the user to authenticate irrespective of any cookie settings |
| Auth Security | Require biometric or PIN to do authentications |
| App Security | Require biometric or PIN to open app |
| IVR Push Notification | Allow user to authenticate through IVR using push notification |
| IVR Security | Require Passkey when approving IVR push notification |
| Account Selection | Allow users to choose an account when multiple accounts are available |
Setup Federation
As a security admin or super admin, you can manage the Applications here. You can create, update and delete the SAML and OIDC applications and update the login preferences.
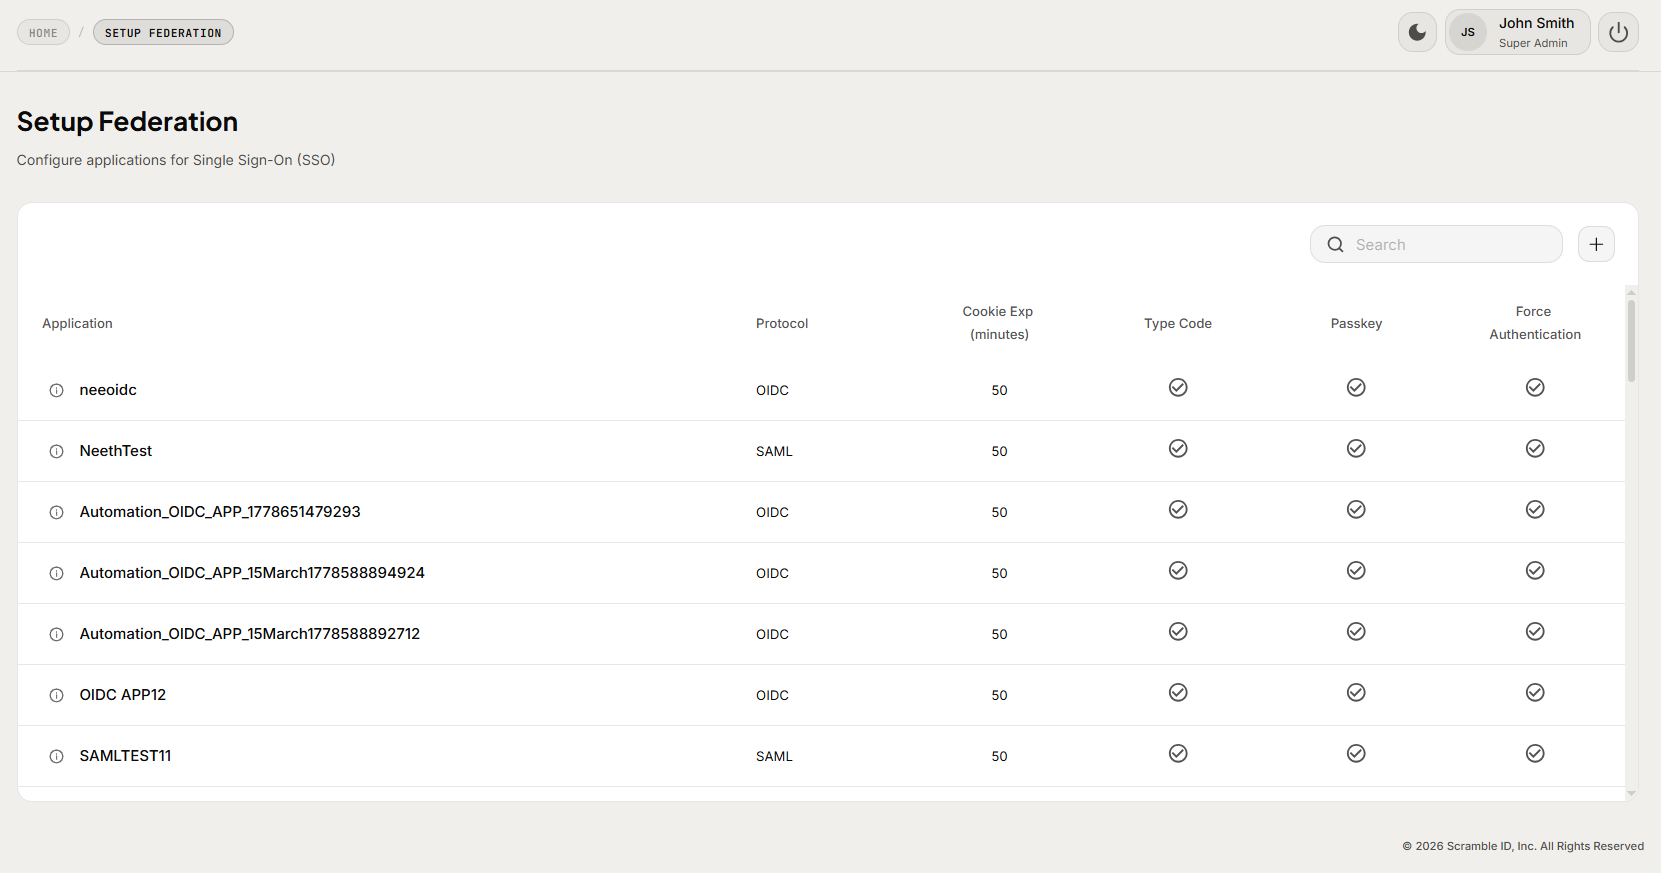
Adding SAML Applications
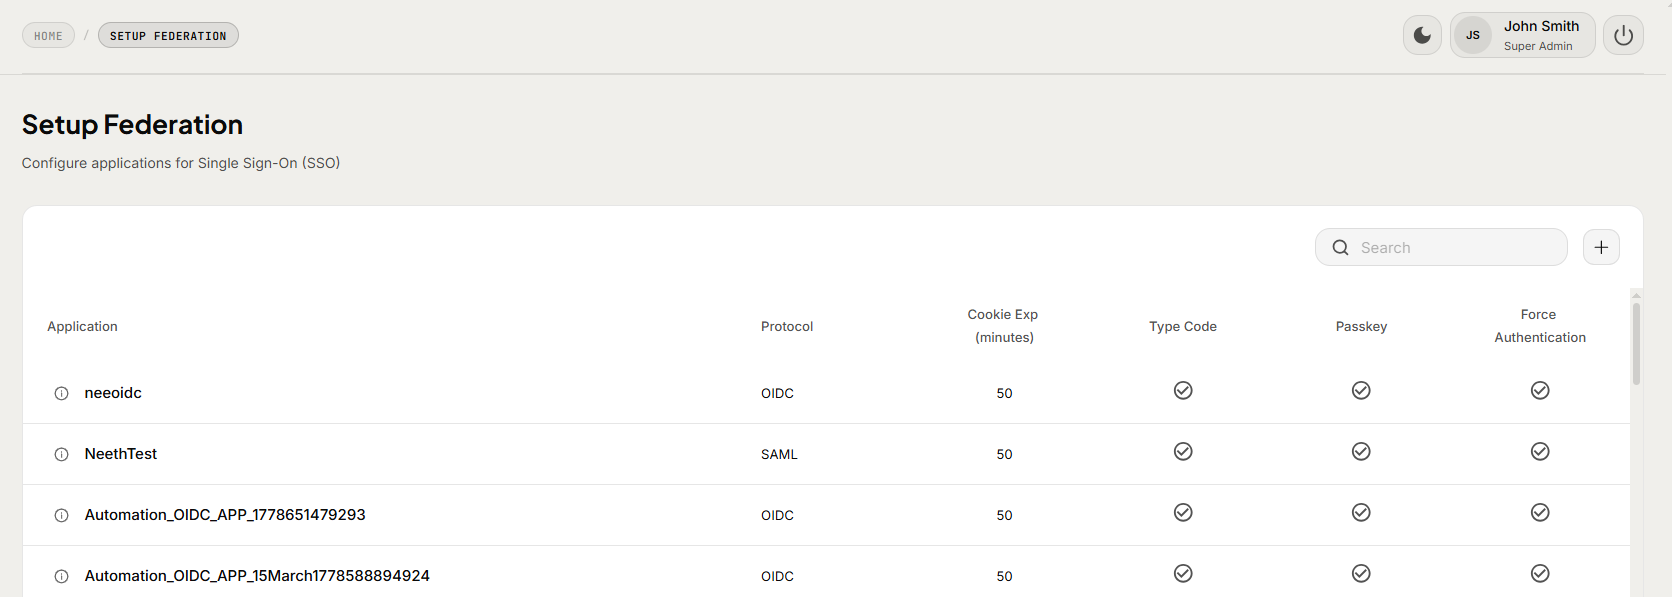
To add SAML Applications:
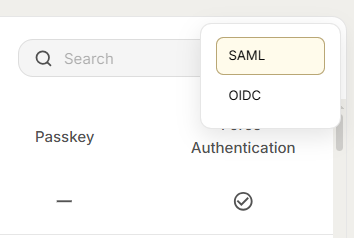
Navigate to Setup Federation,select the + button on the top right, and choose the SAML option.
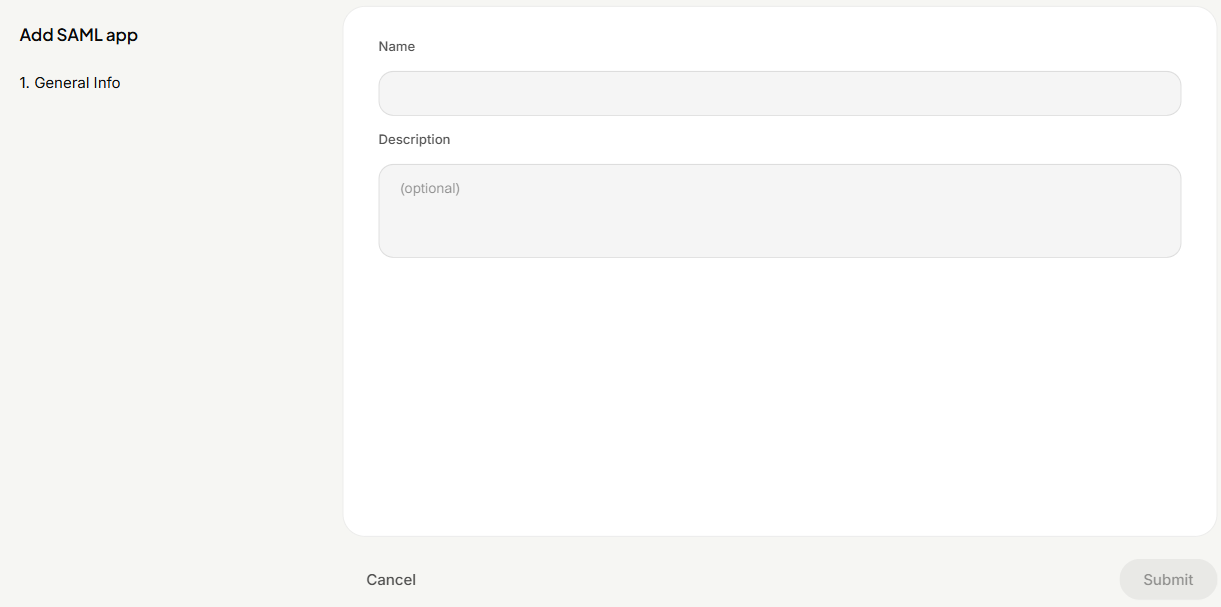
Enter the SAML app Name and Description, hit Submit..
Your new SAML app is created. You have the option to configure your app, set login options and edit the name and description if required.
You will have to generate your Identity Provider (IDP) metadata file and upload it in the SAML application. The configuration section enables you to upload IDP metadata and the Service Provider (SP) metadata and define the necessary attributes for your SAML application.
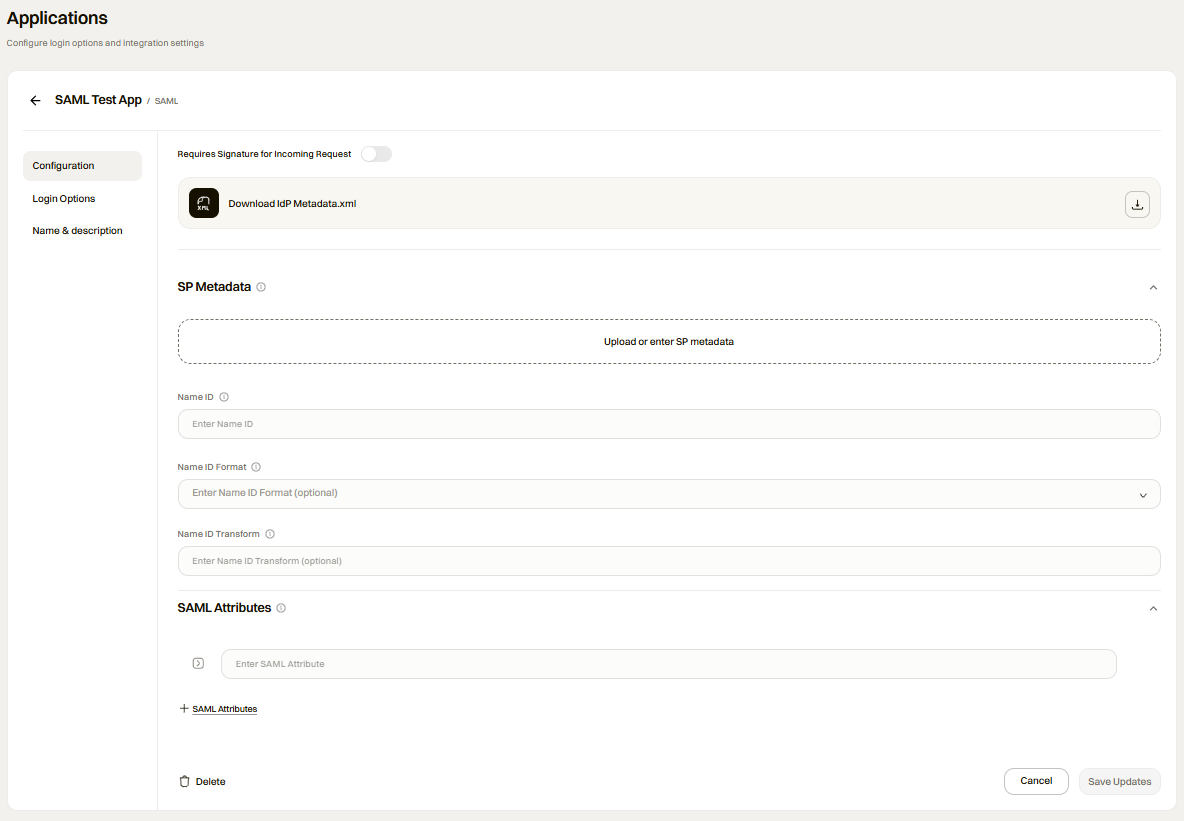
Click Upload or enter SP metadata.
You can either Upload the XML file, enter it Manually or upload URL and hit Proceed.
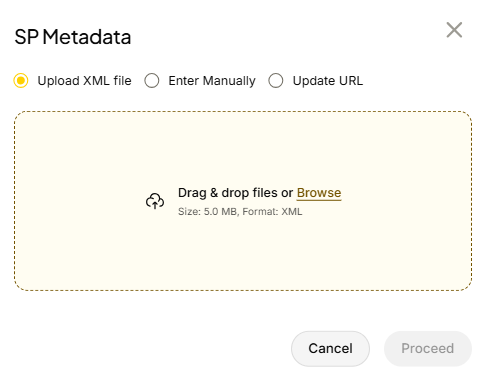
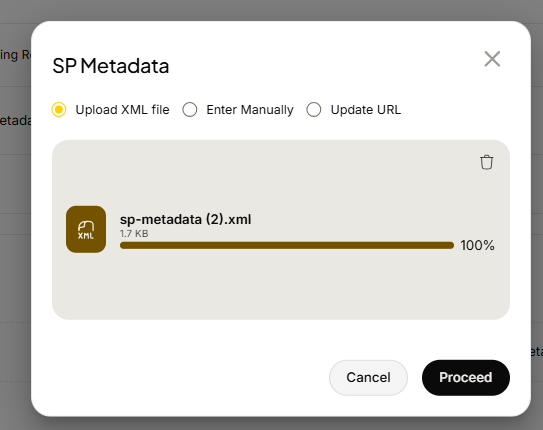
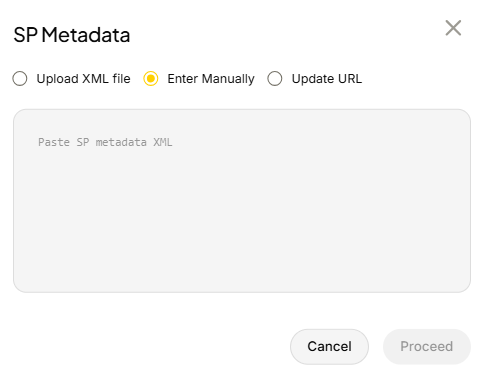
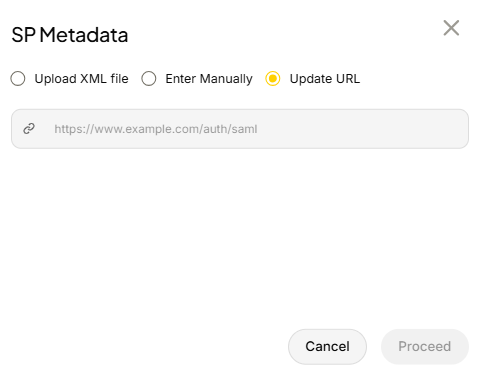
You get an option to Edit SP Metadata.
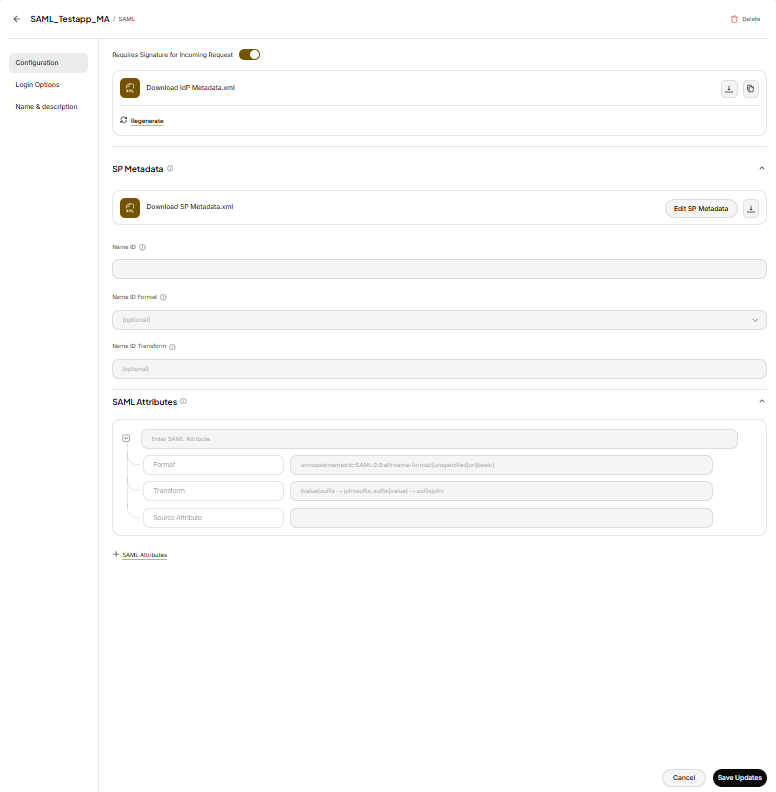
You can either Upload an XML file or Enter the data Manually or Update URLand hit Proceed.
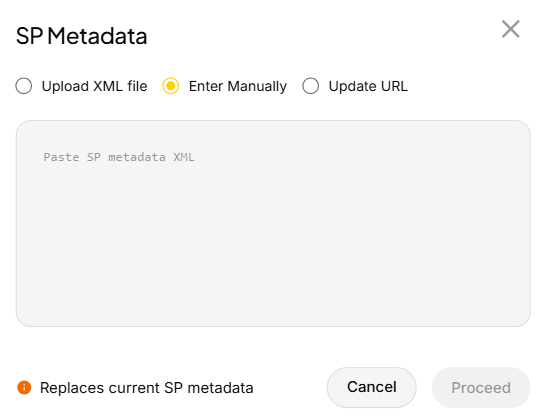
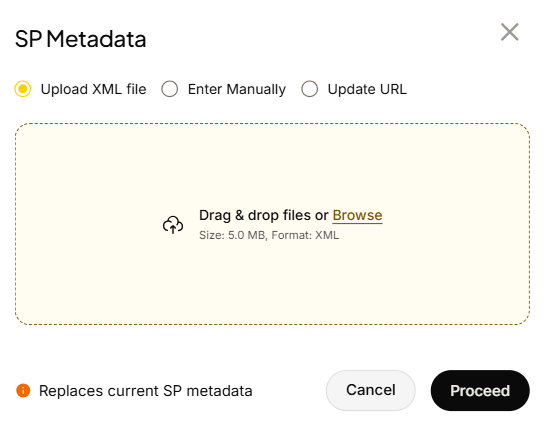
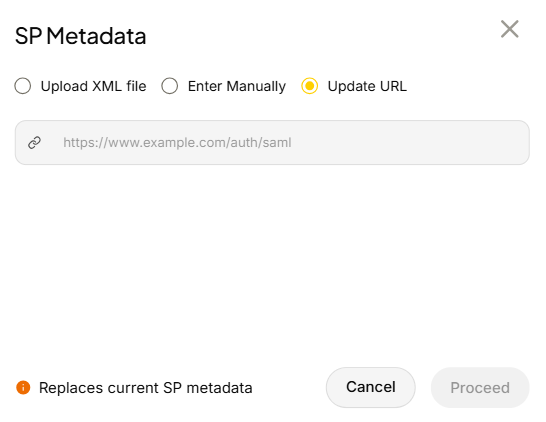
Next, you can configure the Login Options to establish preferences for your SAML application, including the maximum cookie limit.
After setting all the required configurations, hit Save Updates.
Adding OIDC Applications
To add OIDC Applications:
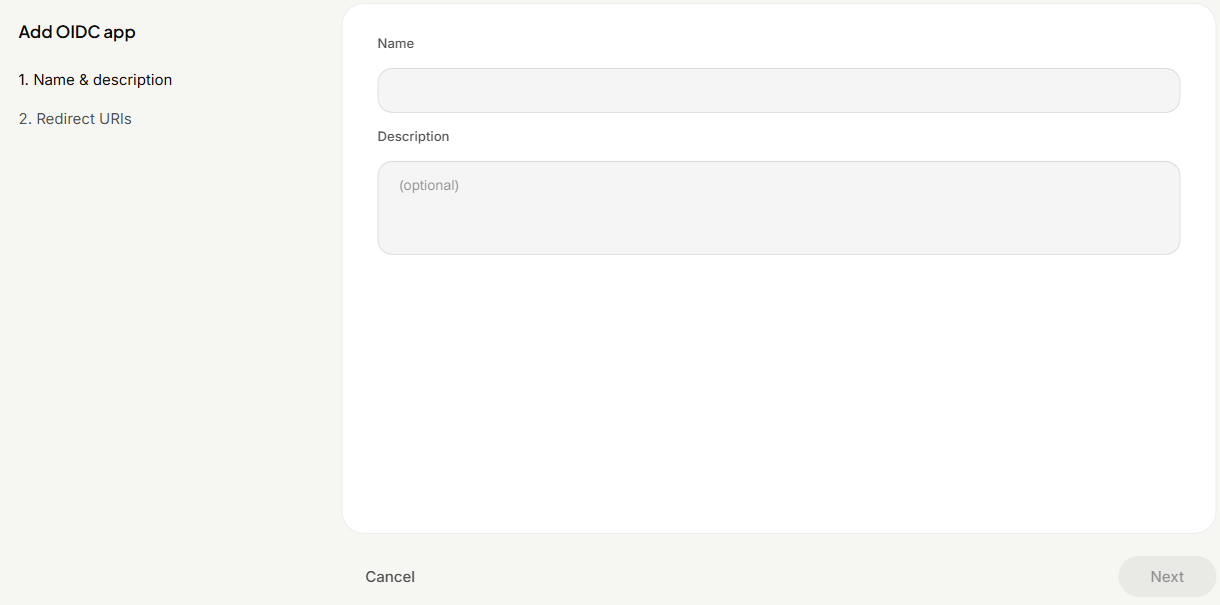
Navigate to Setup Federation,select the + button on the top right, and choose the OIDC option.
Enter the OIDC app Name and Description, hit Next.
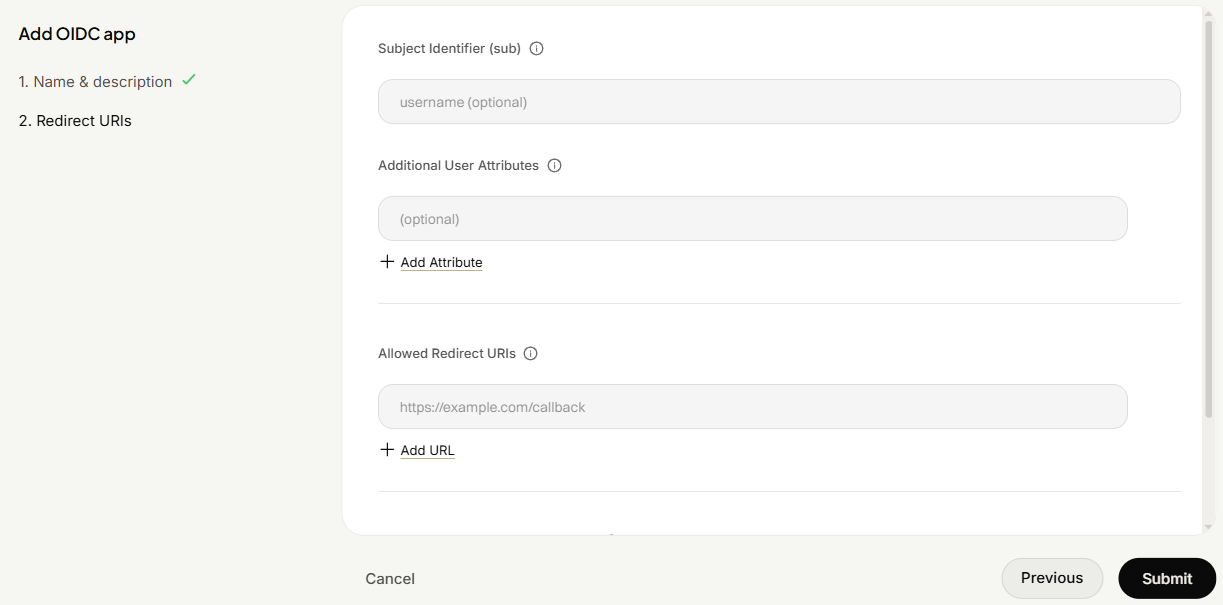
Adding a Subject identifier is optional. Add Redirect URIs and Submit. You can click +Add Attribute to add more user attributesand +Add URL to add more than one URL as per your app requirement.
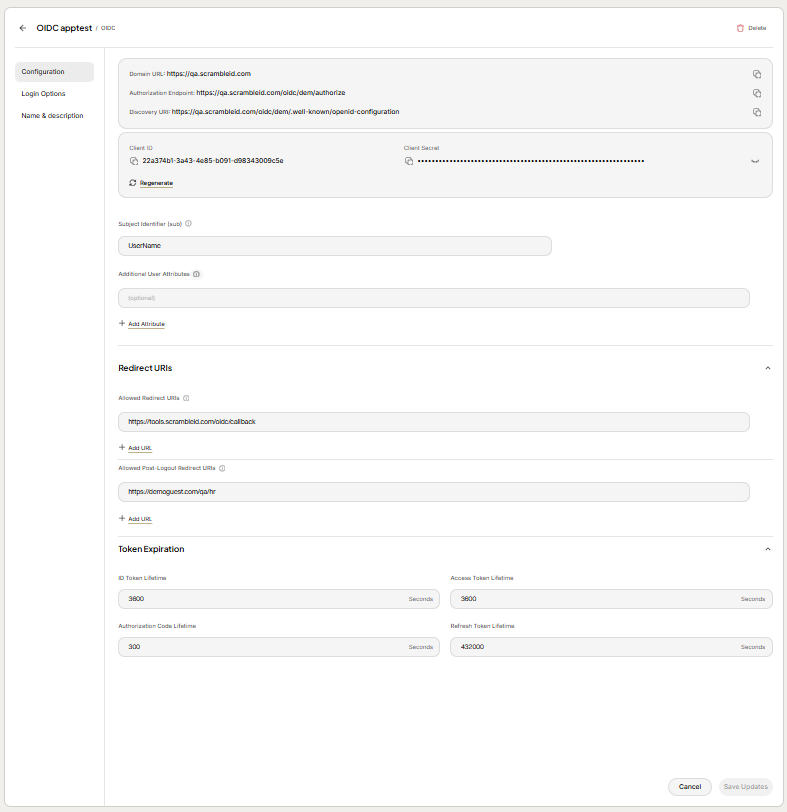
After successfully adding the OIDC App, navigate to Setup Federation to view app details. The app has three sections:
- Configuration
- Login Options
- Name & Description
Click Configuration. This section provides the following details:
- Domain URL and the authorization endpoint, Discovery URL
- Client ID and Client secret
- Subject Identifier
- Additional User Attributes
- Redirect URIs
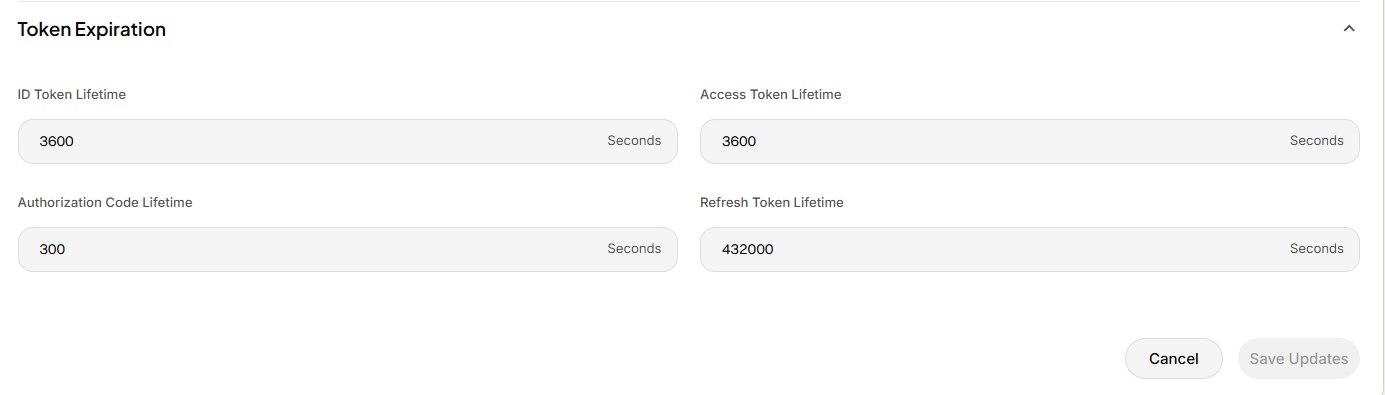
- Token Expiration
Note: The ‘Regenerate’ button allows you to reset the client credentials and the Delete button on the top right, allows you to delete the OIDC application.
Token Expiration
You can set the time in Seconds, for each of the tokens, ID Token Lifetime, Access Token Lifetime, Authorize Code Lifetime and Refresh Token Lifetime and Save Updates.
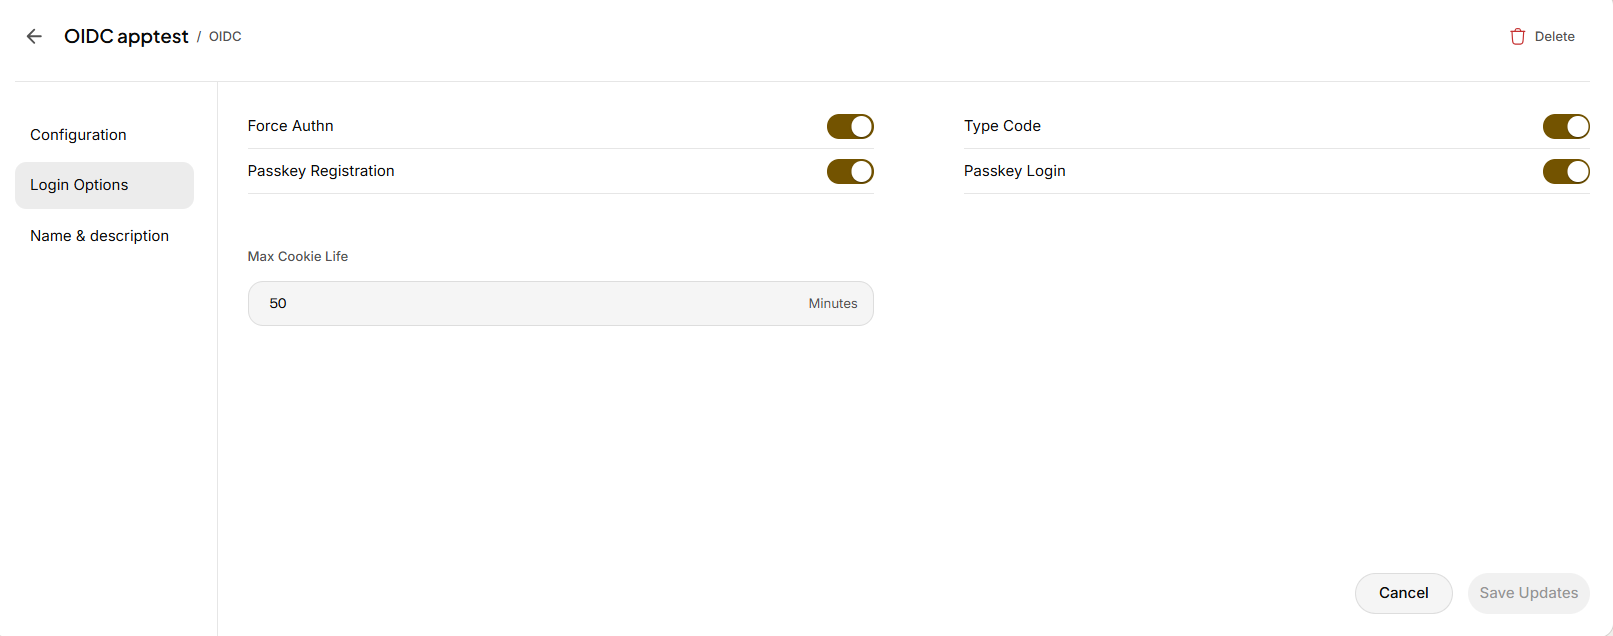
Login Options
Click Login Options. This section provides the following details:
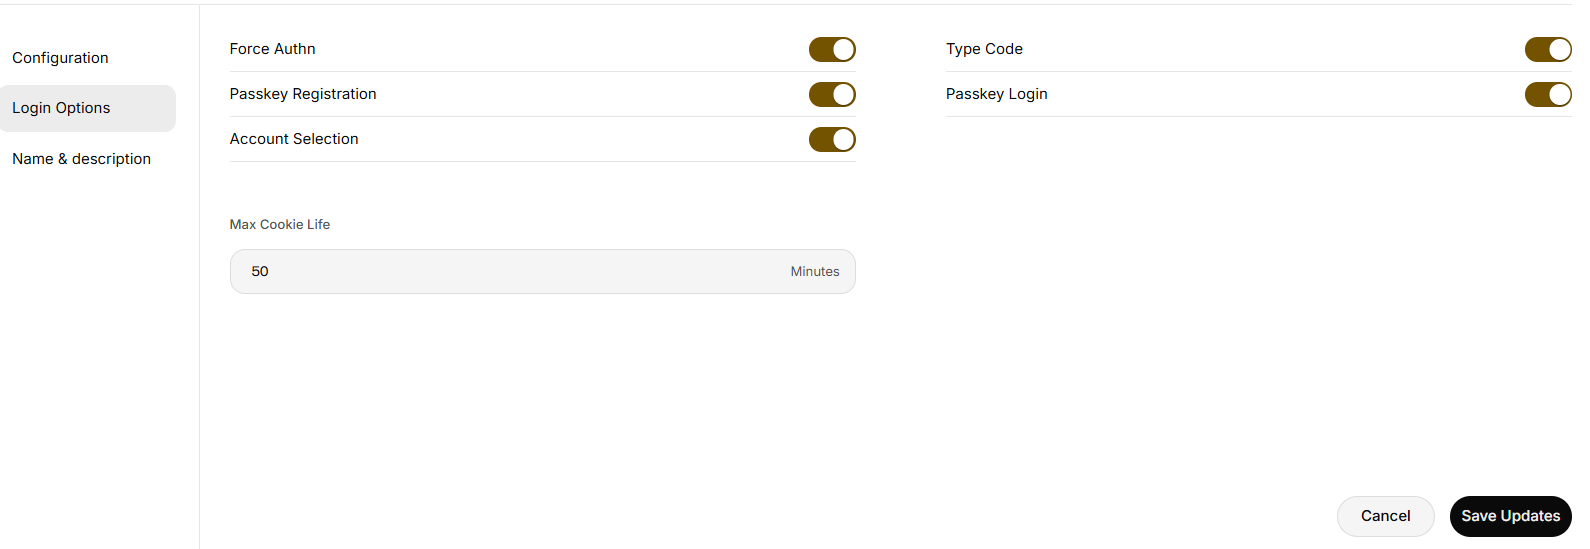
You can toggle (On/Off) the given options - Force Auth, Type Code, Passkey Registration, and Passkey Login. You can also set the max cookie life.
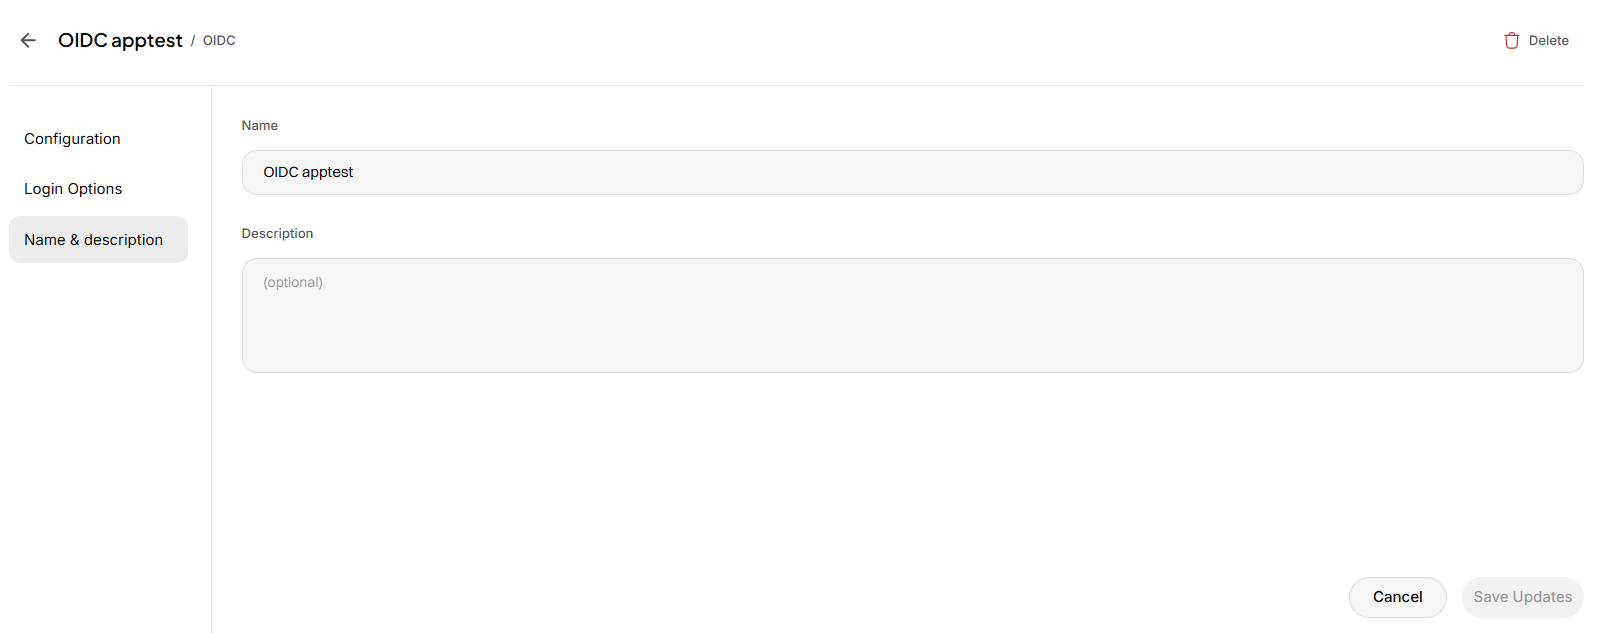
Name & Description
Click Name & Description. This section provides the following details:
You can add the name and description for the app.
Manage Users
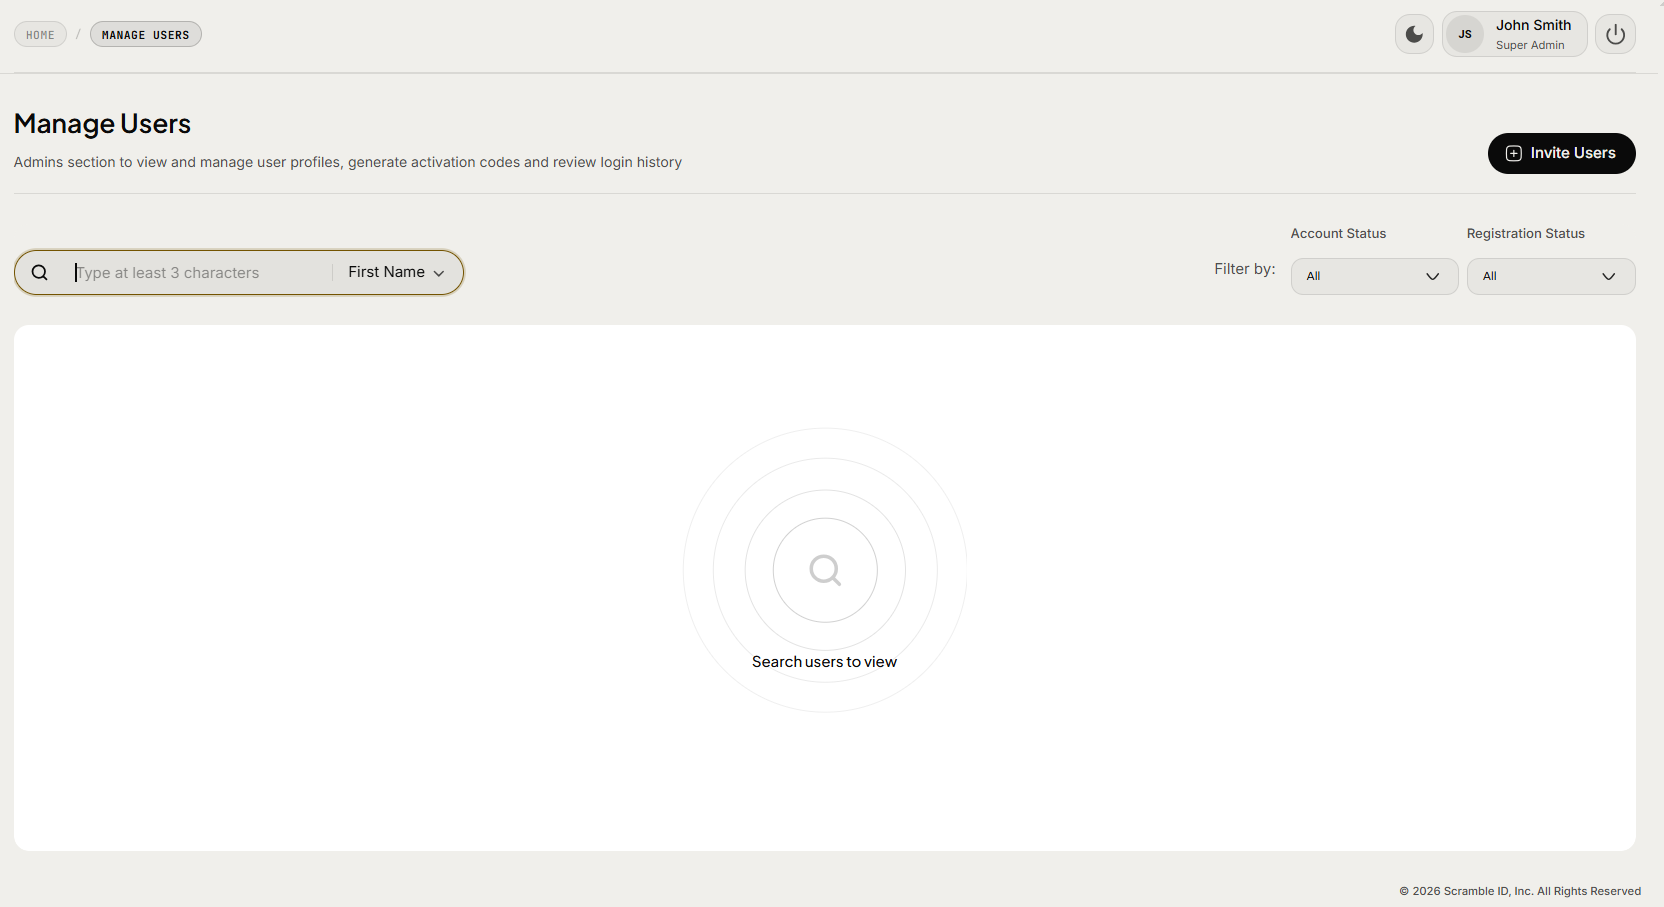
Click the Manage Users link in the navigation pane to search and manage users in your organization.
ScrambleID simplifies core admin tasks into three primary functions:
- Invite Users
- Search Users
- Managing a user
Invite Users
You can invite users to ScrambleID by entering their email individually and clicking + Invite Users, or for bulk invitations, by importing a list of users.
Invite Users by mobile and Manual input are selected by default. You can provide a list of one or more users in the text box and click Generate Codes to generate activation codes for the users.
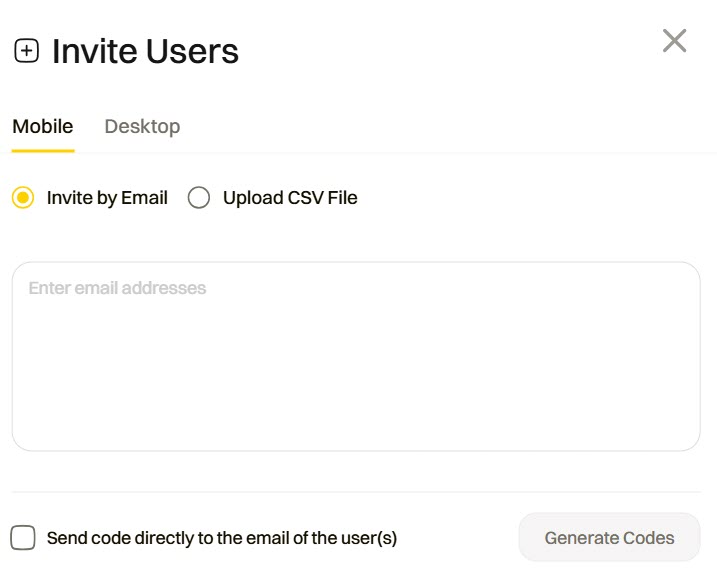
Select the Send code directly to the email of the user(s) checkbox to send an email invite to the user.
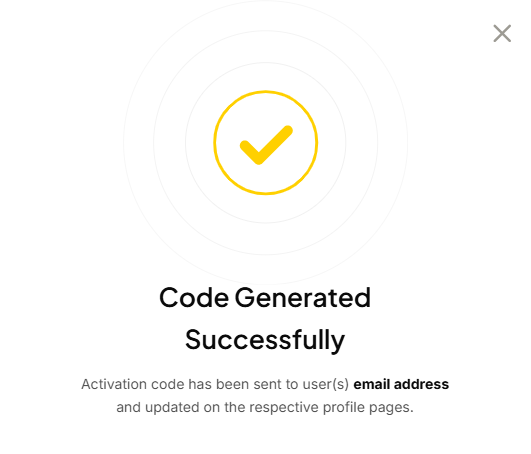
A pop-up with the status of the invitation will be displayed.
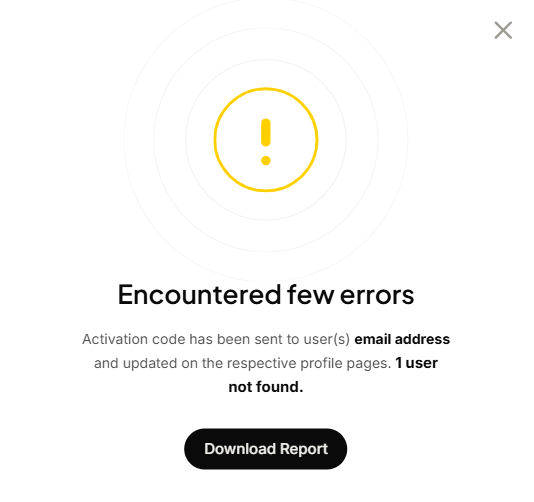
If there are users for whom the invite operation has failed, you have the option to download a report with the list of failed users.
Bulk Generate Invitations (CSV)
After the initial implementation of ScrambleID in your organization, you’re likely to want to invite large groups of users as a “batch”, from a list of email addresses in a file, instead of individually. In order to do this, select the CSV File Upload option.
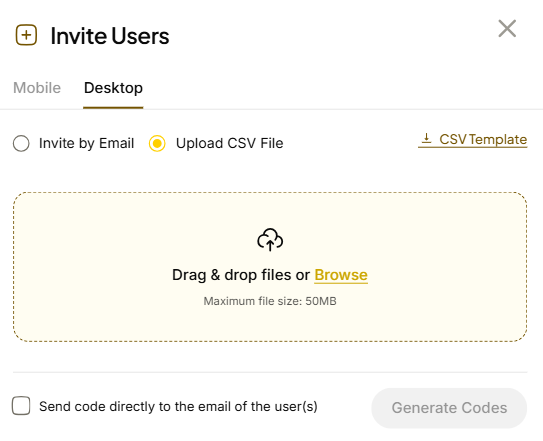
You can download a sample CSV sample by clicking the Download CSV Template link.
You can invite the users via desktop activation code by toggling the Desktop option.
Search Users
From the Manage Users page, you can search for and manage user devices, send sign-up invitations, or help individual users with registration and other issues.
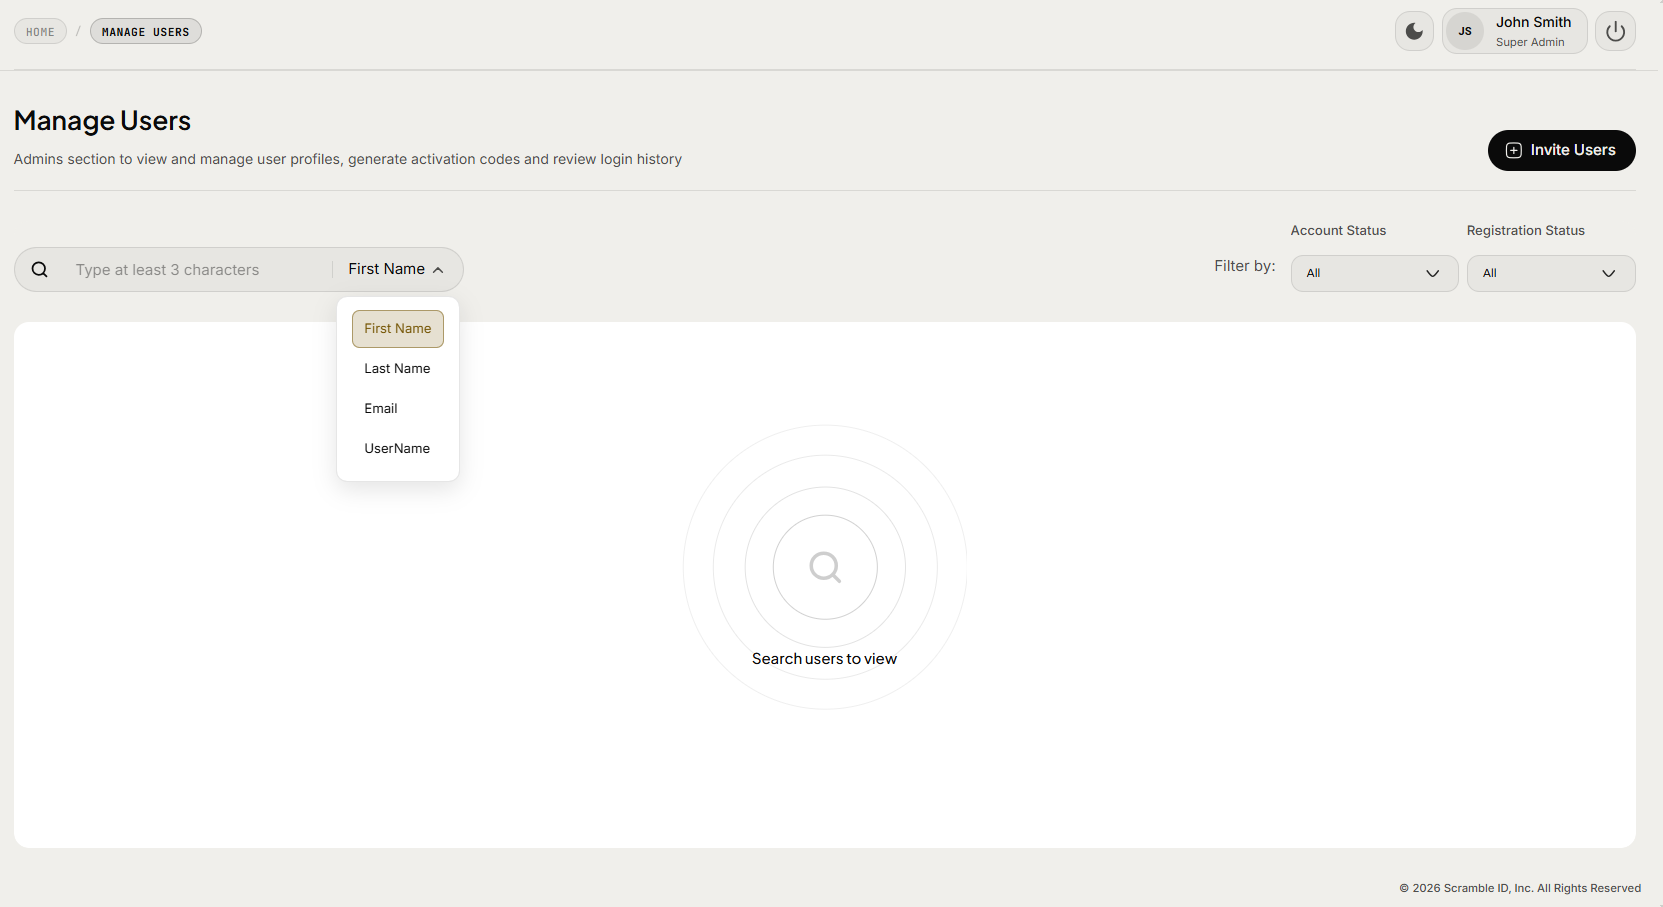
Search Criteria
Enter a value in the Search box, and click any of the fields in the search criteria shown below:
- First Name
- Last Name
- Username
Filter the results by any combination of account statuses:
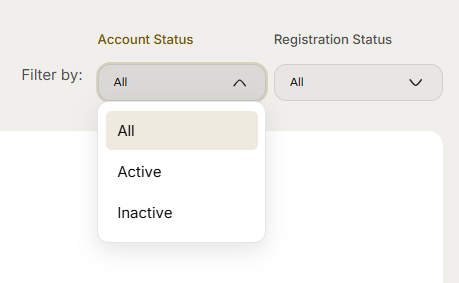
Active: An unregistered user becomes active on completing the first time user registration process.
Inactive: An active user becomes Inactive when they are disabled by an admin through the ScrambleID admin console.
Also, filter the results by any combination of Registration statuses:
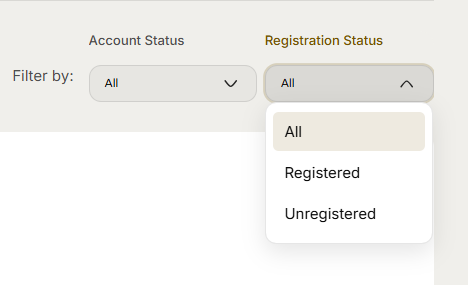
Registered: A user created in ScrambleID through the customer provisioning system and has completed the first time user registration process.
Unregistered: A user created in ScrambleID through the customer provisioning system but has not completed the first time user registration process.
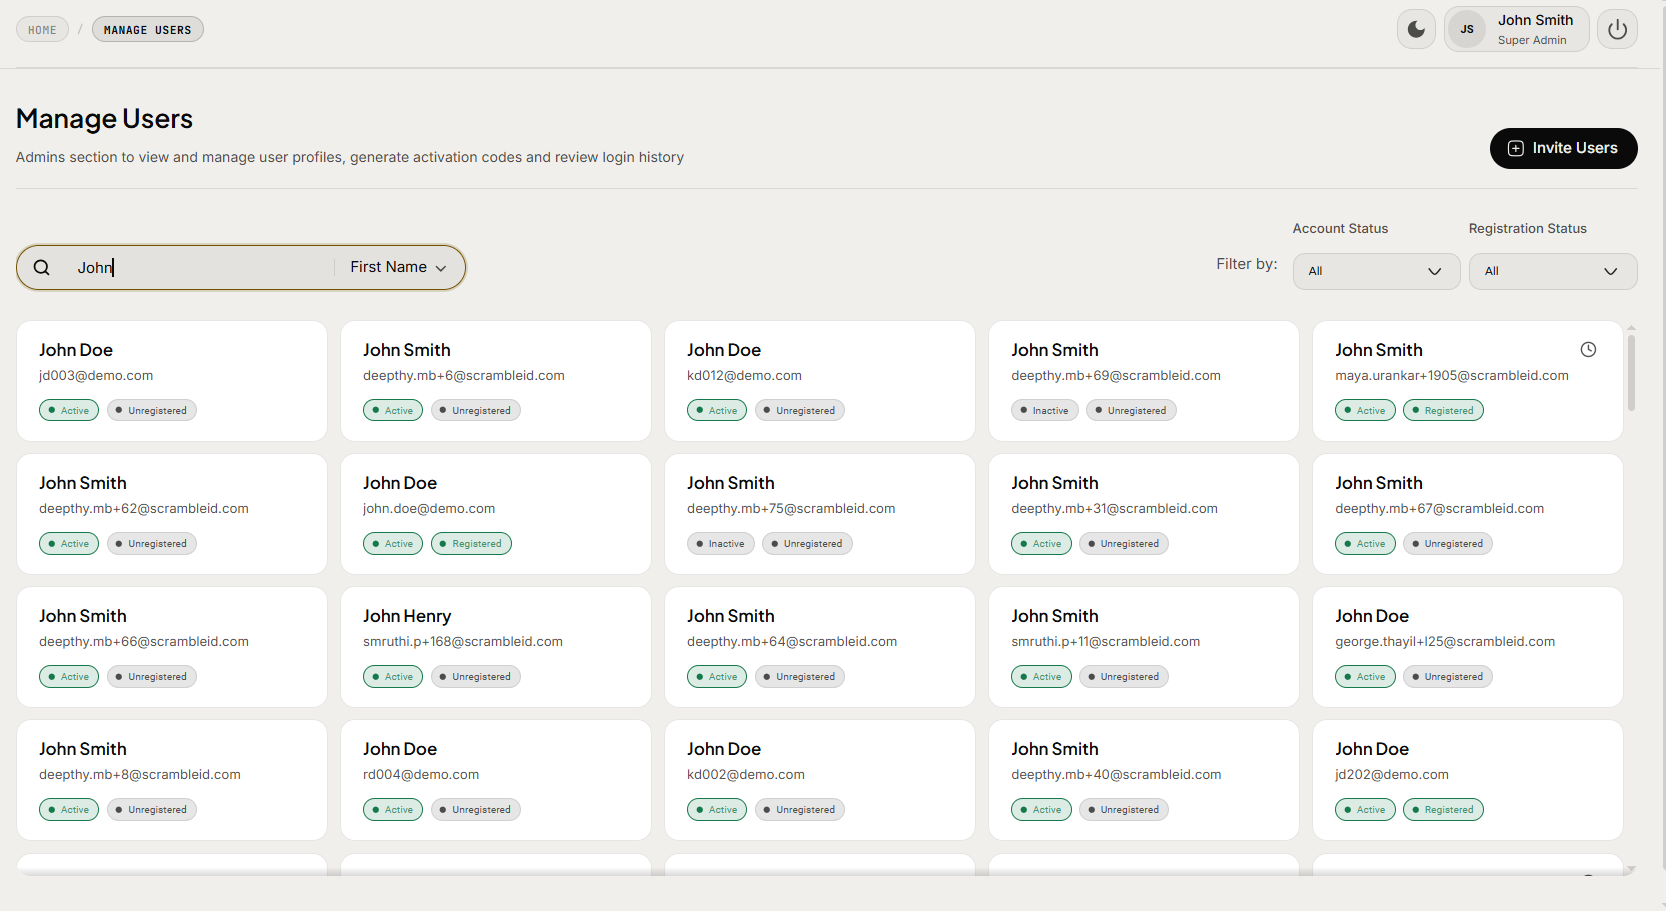
Search Results
Each user that matches your search appears as a ‘tile’ in the lower window. To select and manage an individual user, click on the required card.
Managing Users
After running a search, you can click a card in the search results to open the admin screen for that user.
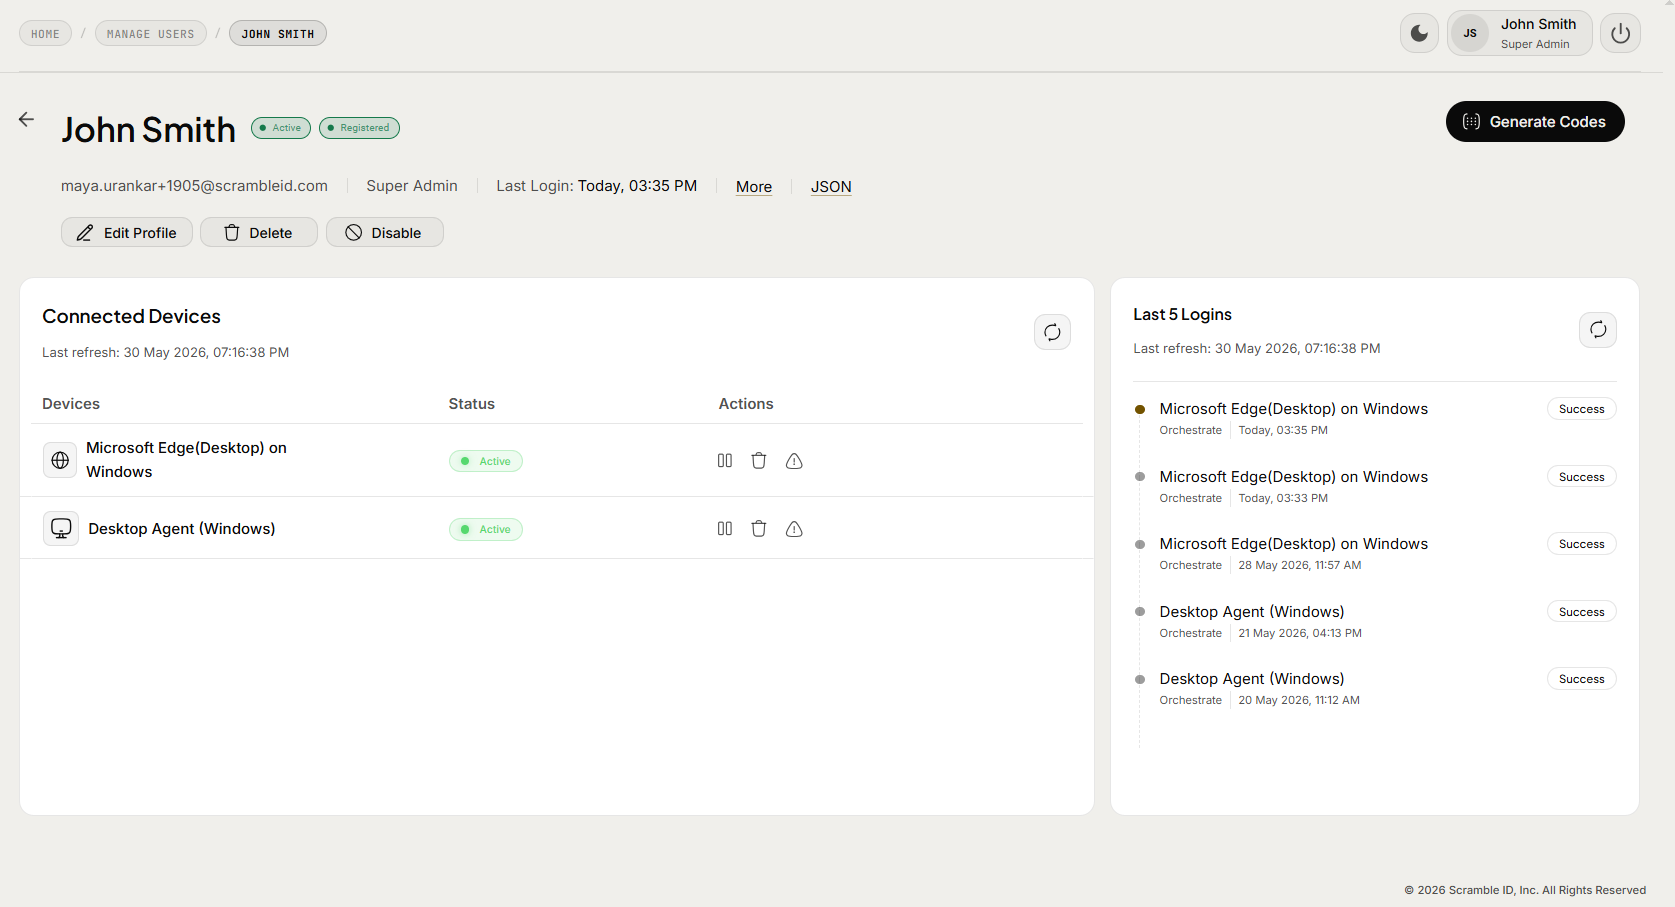


Each pane is dedicated to a specific user management operation.
| Options | Purpose | |
|---|---|---|
| 1 | User Account | User account information and status change |
| 2 | Generate Codes | Generate mobile / desktop activation code |
| 3 | Device list | All devices associated with the user account |
| 4 | Login history | Log of login events |
| 5 | More | Last login and Attribute details, example ldapid and windowsid |
| 6 | JSON | JSON Data |
The devices and login lists are dynamic, so if you don’t see an entry you expect to, click the refresh button (

) to ensure the list displays the latest data.
Modify User Account
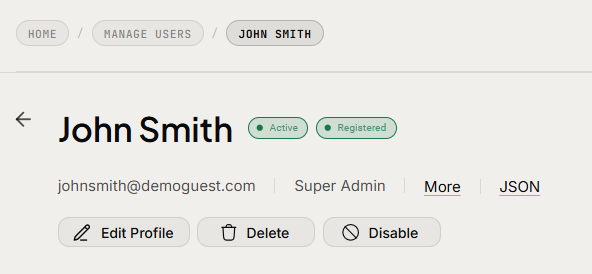
- Click Edit profile to edit the user details like First name, Last Name and Email Address.
- Click Delete to permanently delete the registration and the user goes back into “Unregistered” status.
- Click Disable to disable the user and move to ‘Inactive’ status
| Note: Some of these features may be unavailable based on the custom implementation in your organization. |
|---|
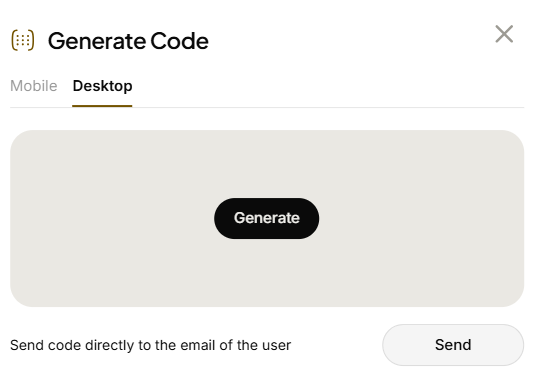
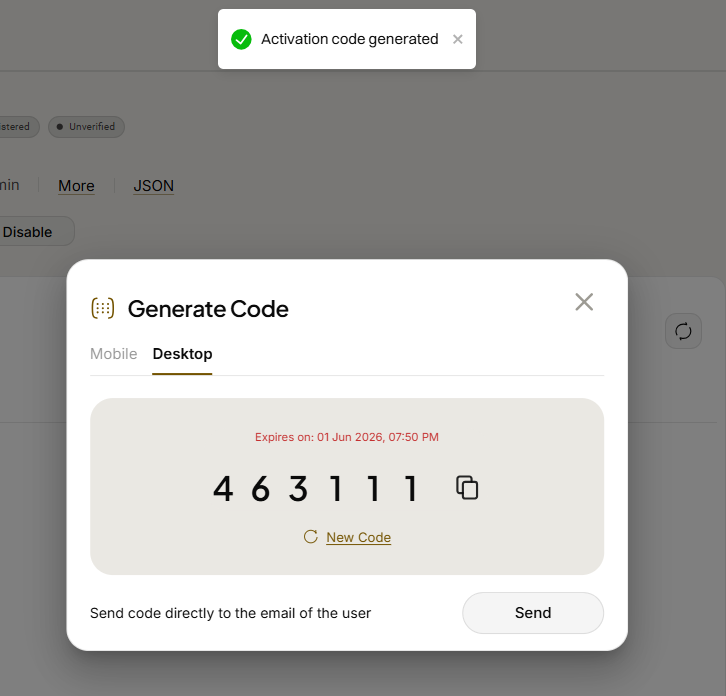
Generate a User Activation Code
There are two types of Activation Codes - Mobile and Desktop. Desktop activation codes can only be generated for users who have a specific attribute set from the customer provisioning system.
Help desk admins and Super admins can generate both mobile and desktop activation codes.
Steps to Generate Activation Code
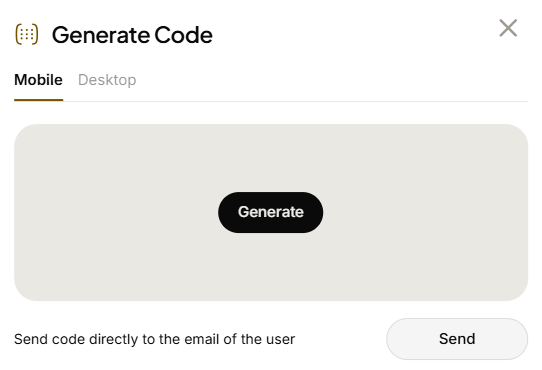
- Select the Activation Code for Mobile tab or the Activation Code for Desktop tab based on end-user needs.
- Click Generate to generate an activation code.
- Click Send if you want the user to get the code directly to their email.
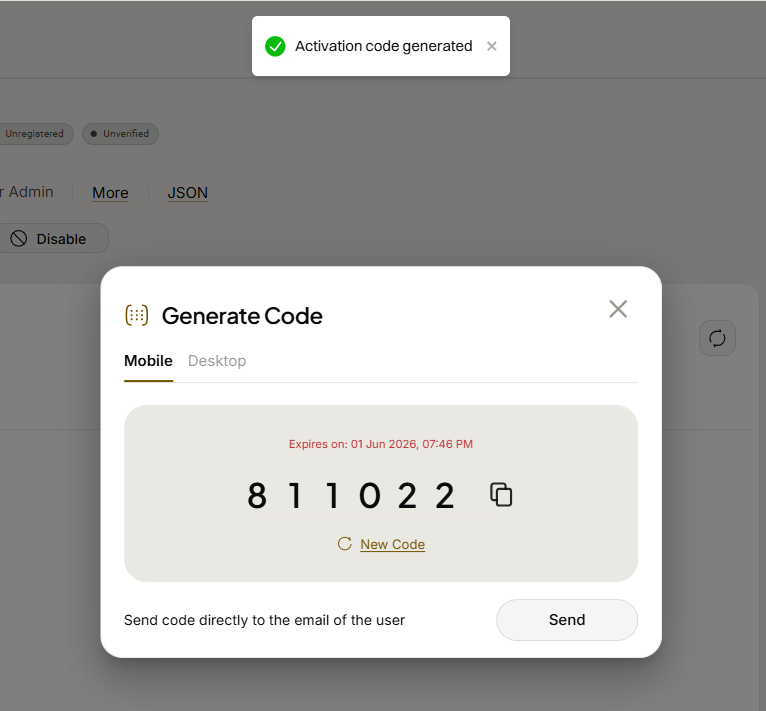
However, a CallCenter admin can generate only Desktop activation code and does not have the permission to generate Mobile activation codes.
Manage User Devices
Super Admin, Help desk admin and CallCenter admin will be able to manage devices for users including disable, report lost and delete a user’s device.
View User Login History
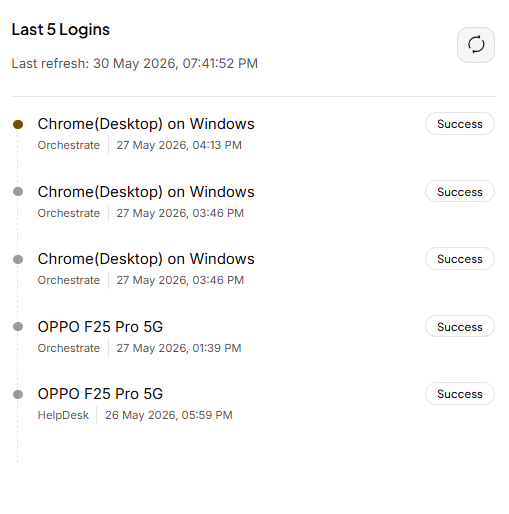
Super Admin, Help desk admin and CallCenter admin will also be able to view the login history of any user
FAQ
**Who do I contact if I have a question?**In your admin role, you should be assigned a specific support channel to get help with questions about the ScrambleID admin console.
**Where do I get values for OIDC settings (Super Admin only)?**These are provided for you through your IT staff or ScrambleID support.
**Can I use more than one device to access the same organization?**Yes, but you are limited by the maximum number of devices set by your organization.
**Can I use one device for access to multiple different organizations?**Yes.
**How does ‘look and feel’ branding work for our organization?**Super Admins & Security Admins can set preferred text, colors, and a logo graphic for display on the ScrambleID login page.
**How does our organization provide a branded Welcome Email?**Provide your branding requirements through a ticket opened in the ScrambleID Customer Support Portal.
**How does support and escalation to ScrambleID work?**Raise a ticket with appropriate priority on ScrambleID Customer Support Portal. Please refer to your Service Agreement for response times and escalation details.
Contact Us
Need more help?
Your organization’s help desk can help resolve issues, assist with new registration, or provide an activation code for new and/or replacement devices.
Please also read through our Terms of Service and Privacy Policy.
© 2026 Scramble ID, Inc. All Rights Reserved.